Using the "RunPod Fast Stable Diffusion template" to create an instance for Stable Diffusion

In this post we will go step-by-step through the process of setting up a RunPod instance instance with the "RunPod Fast Stable Diffusion" template and using it to run the Automatic1111 UI for Stable Diffusion with the bundled Jupyter Notebook.
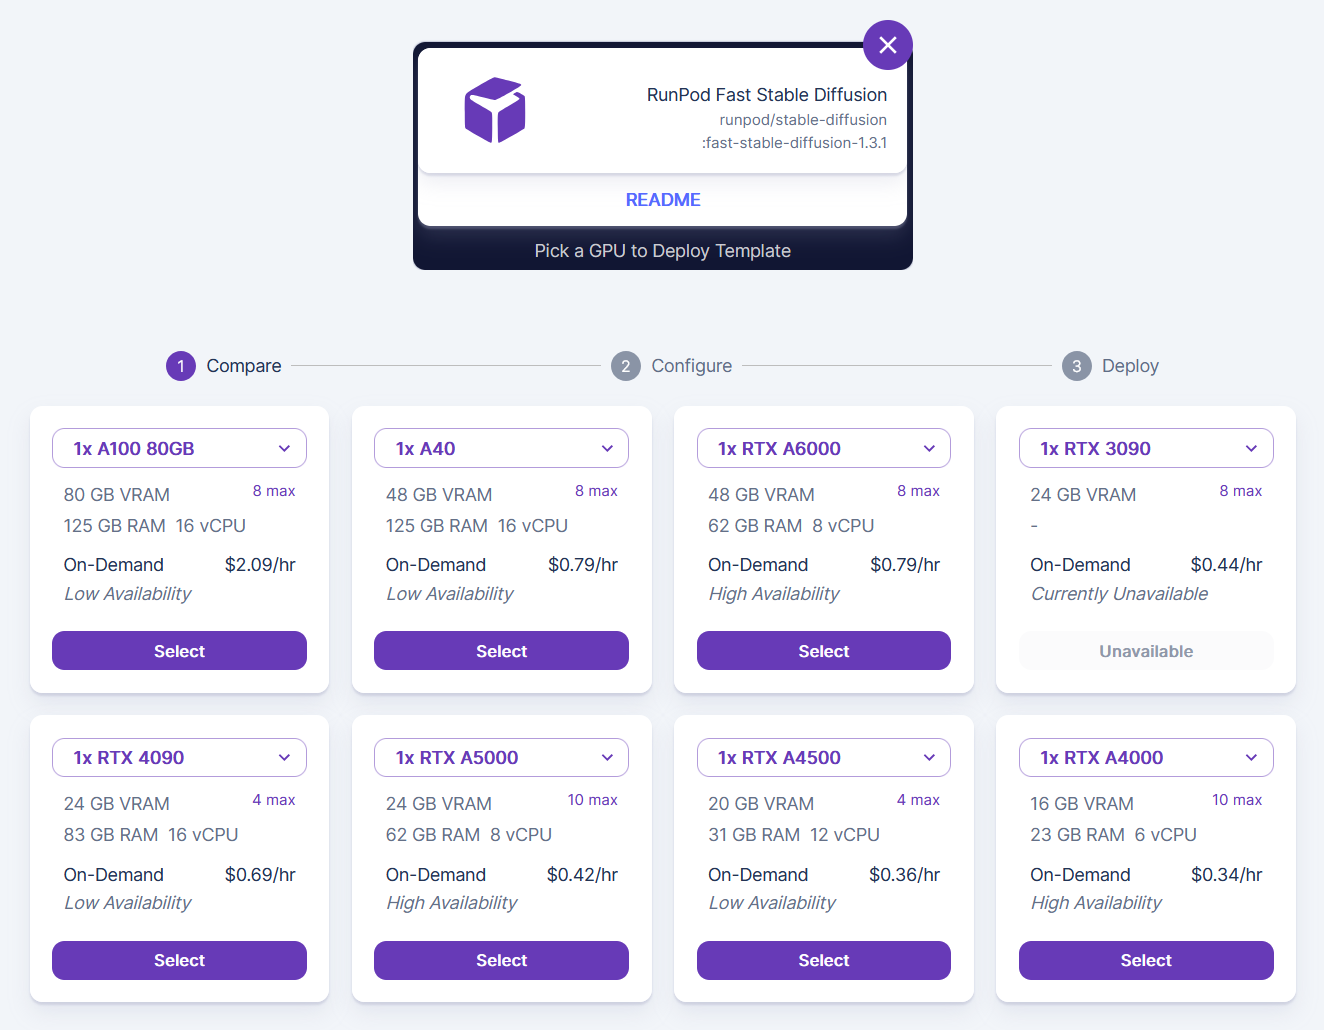
1. To spin up a pod in RunPod's Secure Cloud with the "RunPod Fast Stable Diffusion" template, you can use this link. It will bring you to an interface where you can choose the GPU and parameters you would like your pod to be provisioned with.
Either the "1x RTX 3090" or "1x RTX A5000" are good options for this task. Click the select button under one of the options.
2. Deploy a Stable Diffusion pod
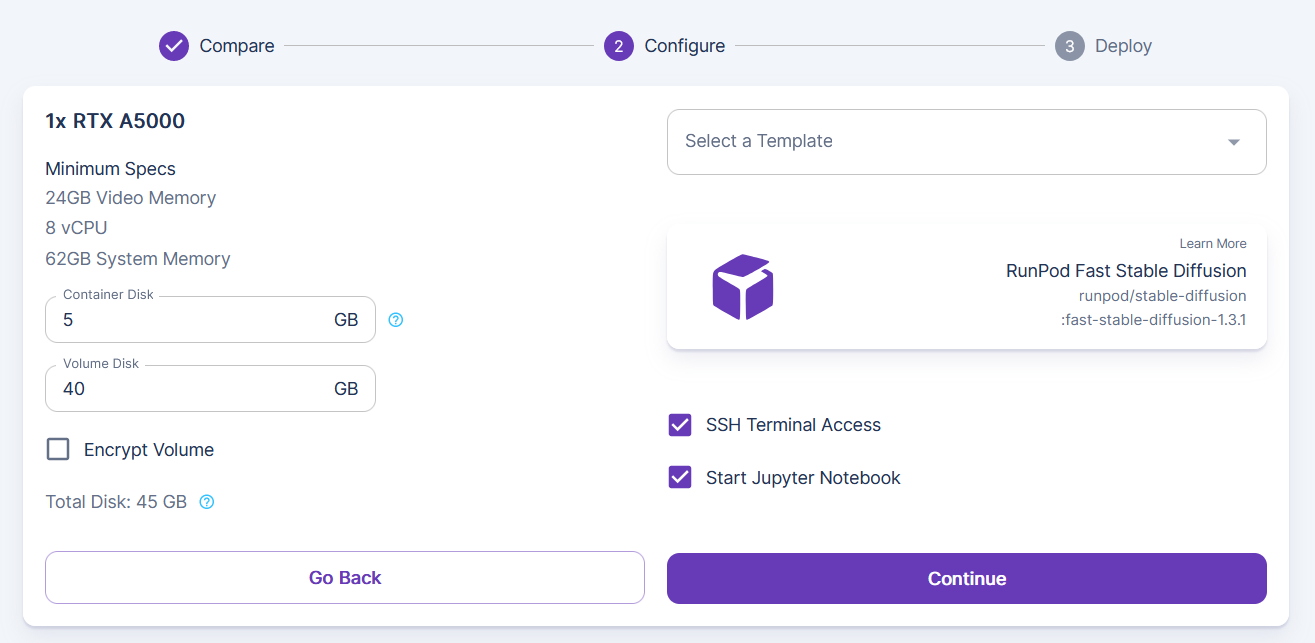
a. You'll see “RunPod Fast Stable Diffusion” is the pre-selected template in the upper right.
b. If desired, you can change the container and volume disk sizes with the text boxes to the left, but the defaults should be sufficient for most purposes.
c. Make sure to keep “Start Jupyter Notebook” checked.
d. Click “Continue” to deploy.
3. You’ll receive a summary of the pod you requested. Review it and click “Deploy” to provision and launch your new pod.

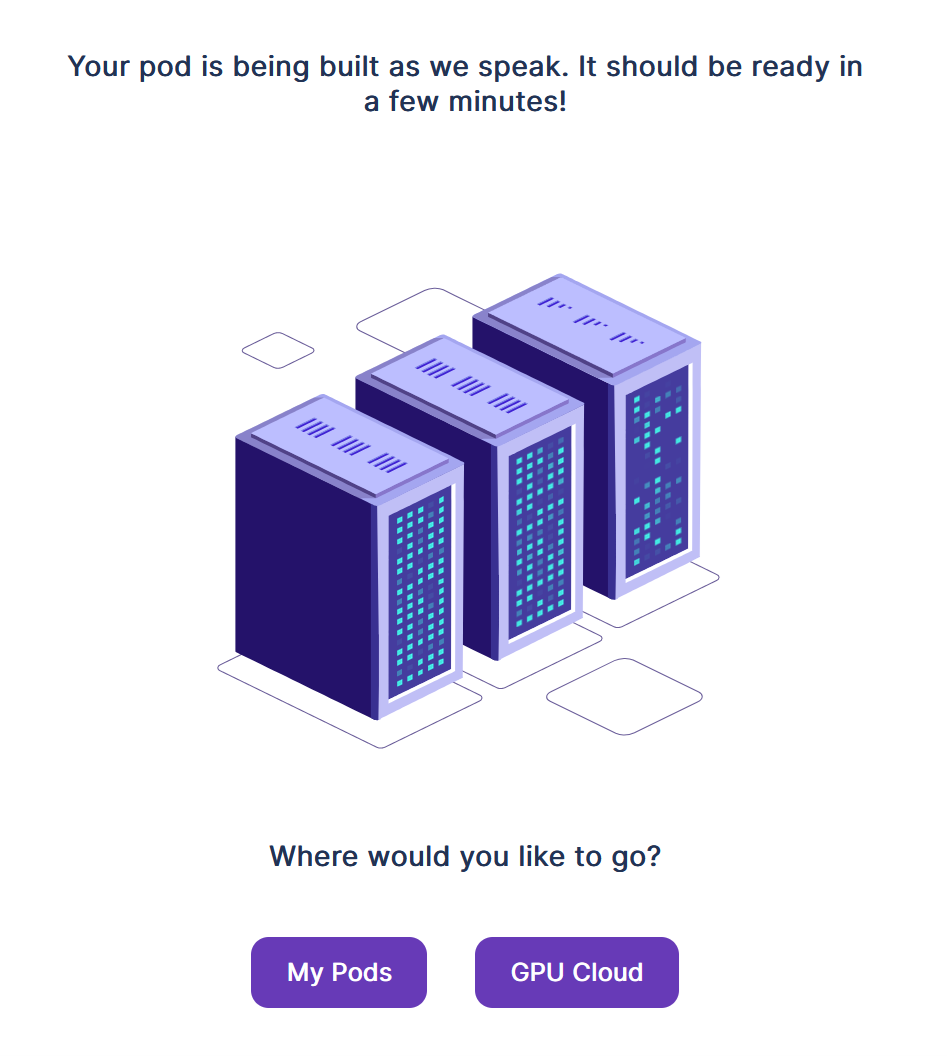
4. Your pod will be set up and available in a few moments. Click “My Pods” to see your pod.
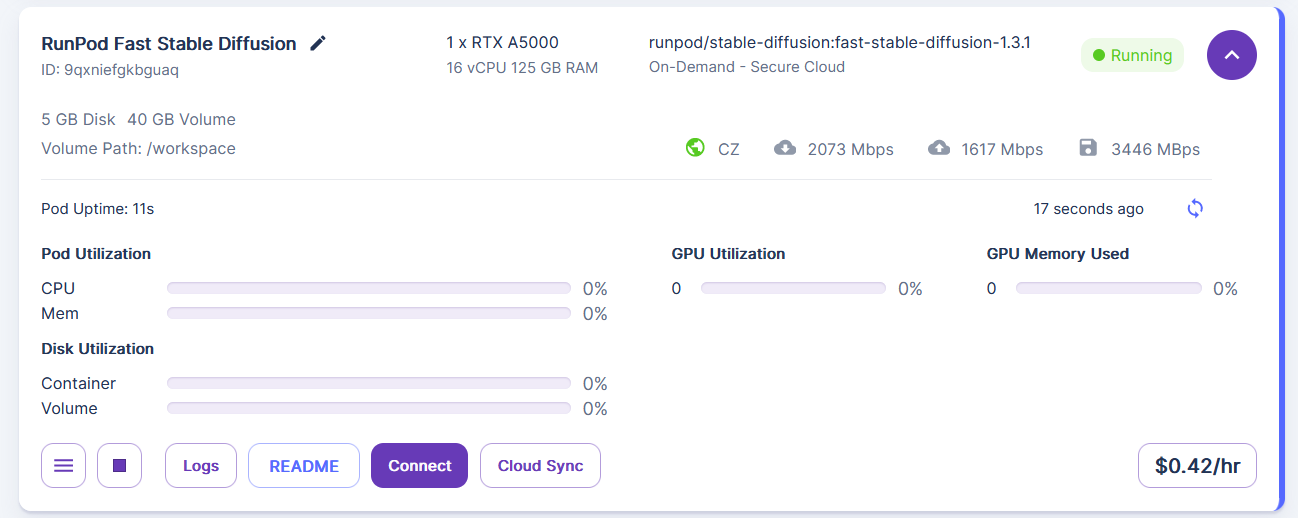
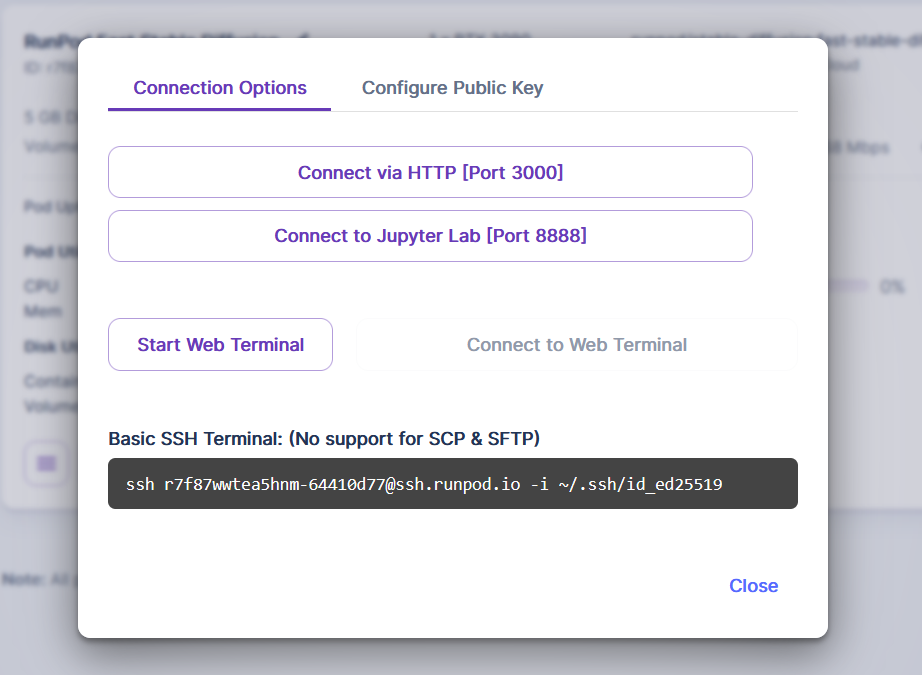
5. Your pod will show up on the “My Pods” page. Click the purple drop-down button in the upper right for additional detail. You can access your pod’s logs from here with “Logs” and connect to it with the “Connect” button. Click “Connect” to continue. If you encounter a 502 error, give Jupyter Notebook a few more seconds to launch, and try connecting again.
6. RunPod will provide a number of different options for connecting to your pod. Since this pod template provides a Jupyter notebook user interface, and we told it to auto-start, click “Connect to Jupyter Lab [Port 8888]”
Running the Automatic1111 Web UI on RunPod
1. You’ll see the automatically generated notebooks in the left-hand pane of Jupyter Lab:
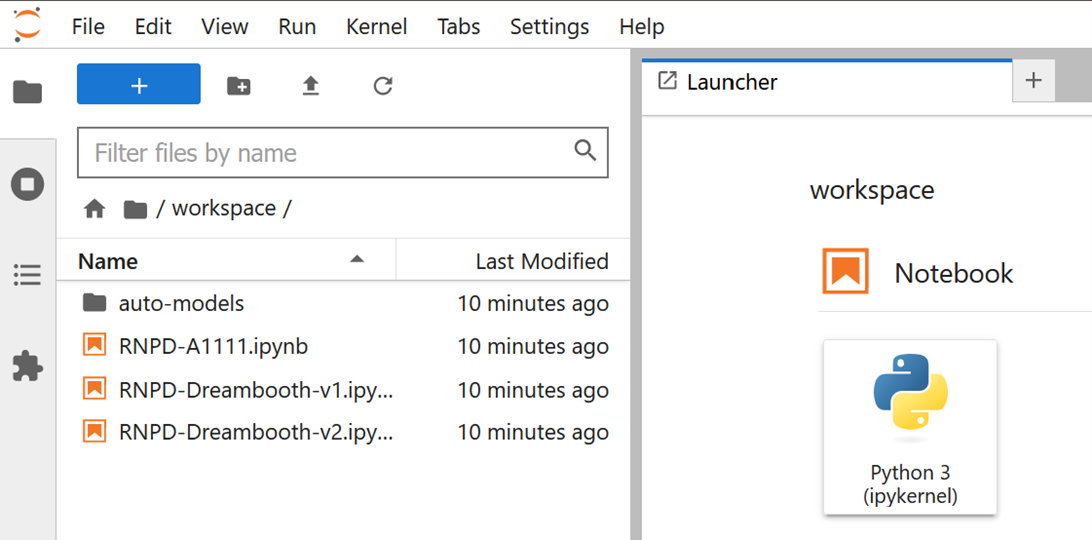
2. Click “RNPD-A1111.ipynb” on the left to launch a notebook that will allow you to set up and launch the Automatic 1111 web UI for Stable Diffusion.
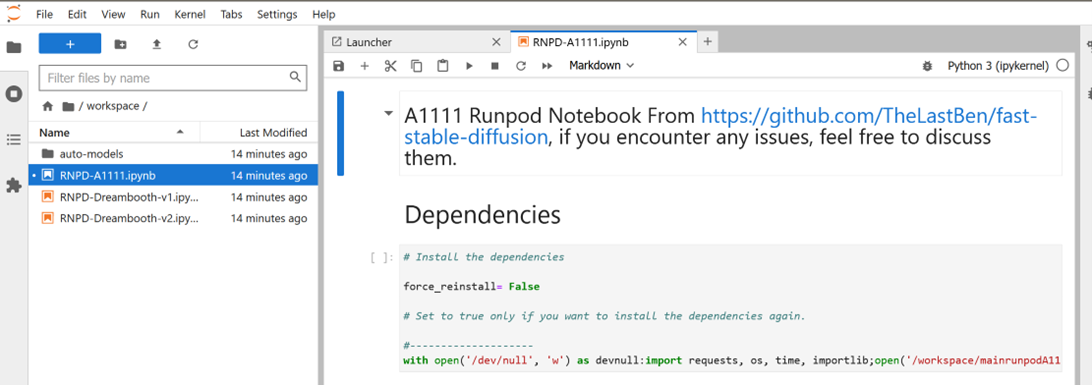
We will proceed cell by cell in the right-hand panel in the typical manner (select each cell, then hit Ctrl+Enter to run the cell) to set things up and launch. The brackets to the left of each cell will show a [*] as the cell is still running, and show a number indicating the order the cells were run in once it is complete. Additionally, the output below the cell will tell you when it is complete and provide any output.
We'll start by running the first cell to install Automatic 1111's dependencies on your pod.
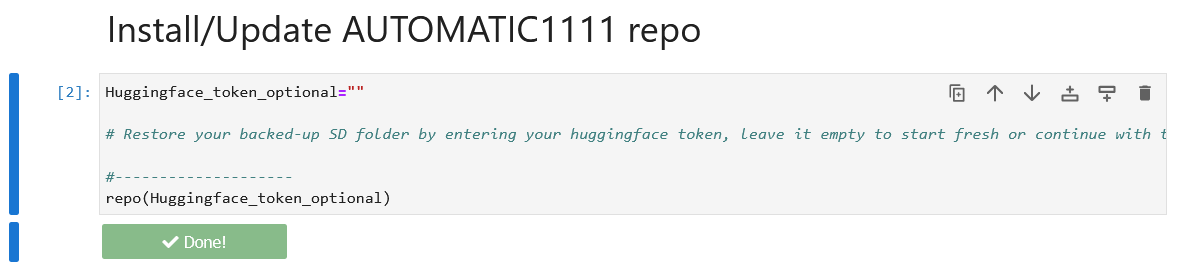
3. Required The next step is to install and update the Automatic 1111 repository. At this stage you can also edit the first line with your Huggingface token to load a previously backed-up Stable Diffusion from Huggingface. In general, where the notebook is meant to be editable there will be a corresponding comment explaining how to use the parameter.
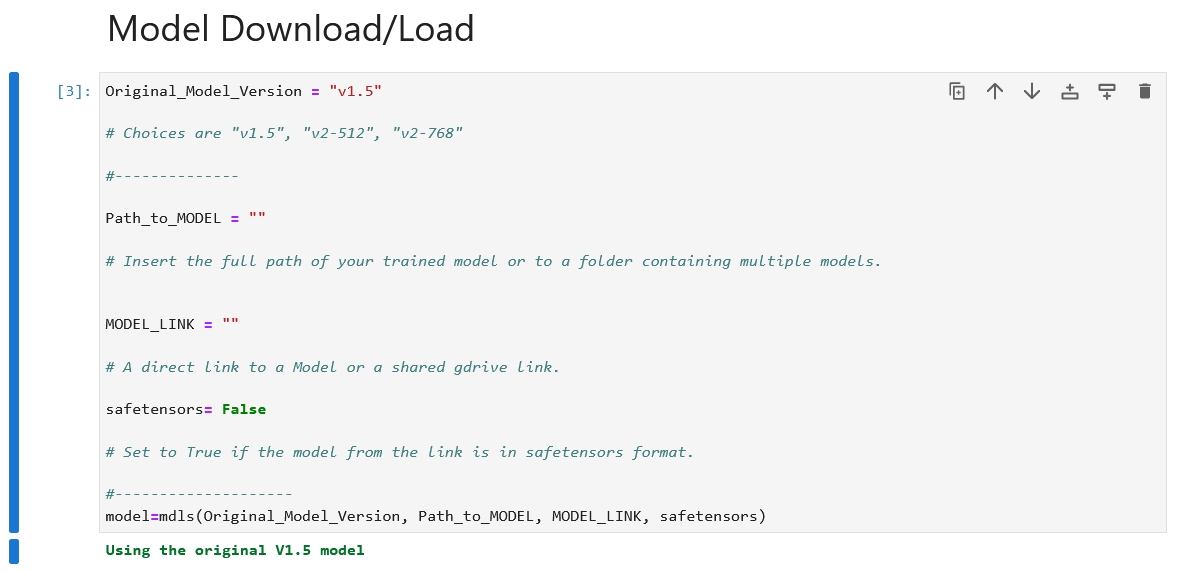
4. Required In the next cell, we'll download the Stable Diffusion model you want to use. By default the notebook will download the "v.1.5" model, but you can update the first line as per the comment below it to load the "v2-512" or "v2-768" model instead.
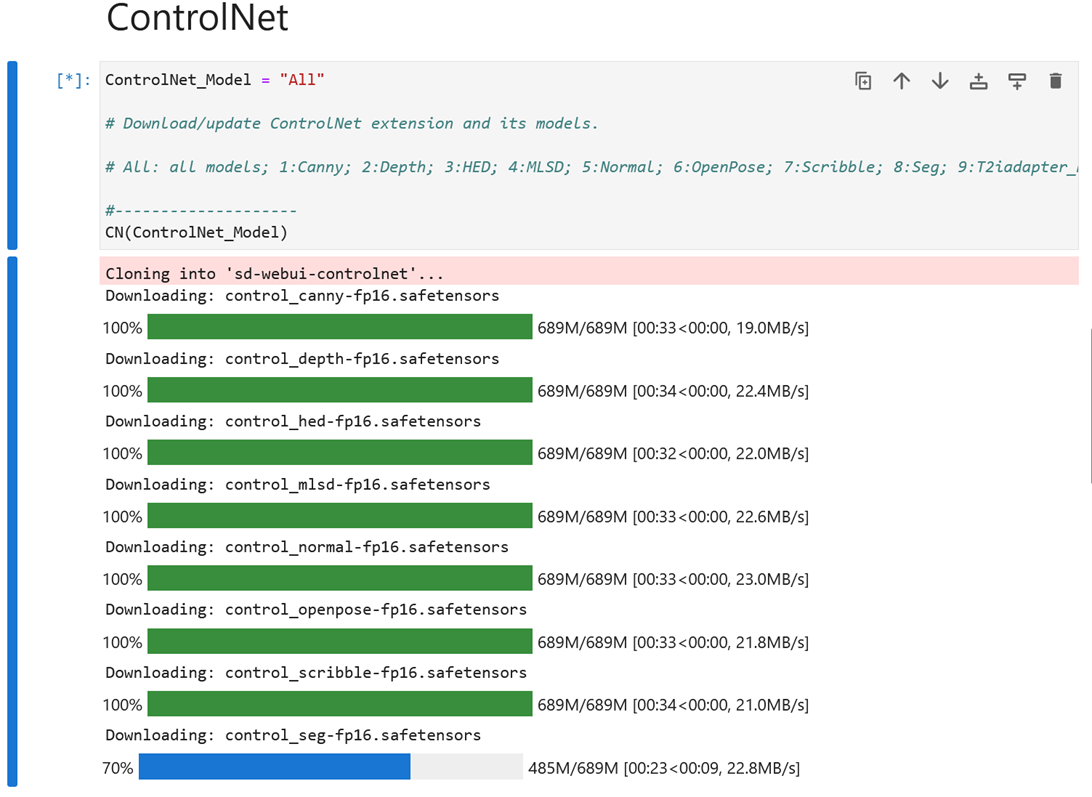
5. Optional Some cells (like the one that downloads the ControlNet models) will take a little while to complete, but will provide feedback on their progress. This cell can be edited before you run to load a specific ControlNet model, changing "All" to one of the numbers as per the comment. If you don't plan to use ControlNet, you can skip this cell.
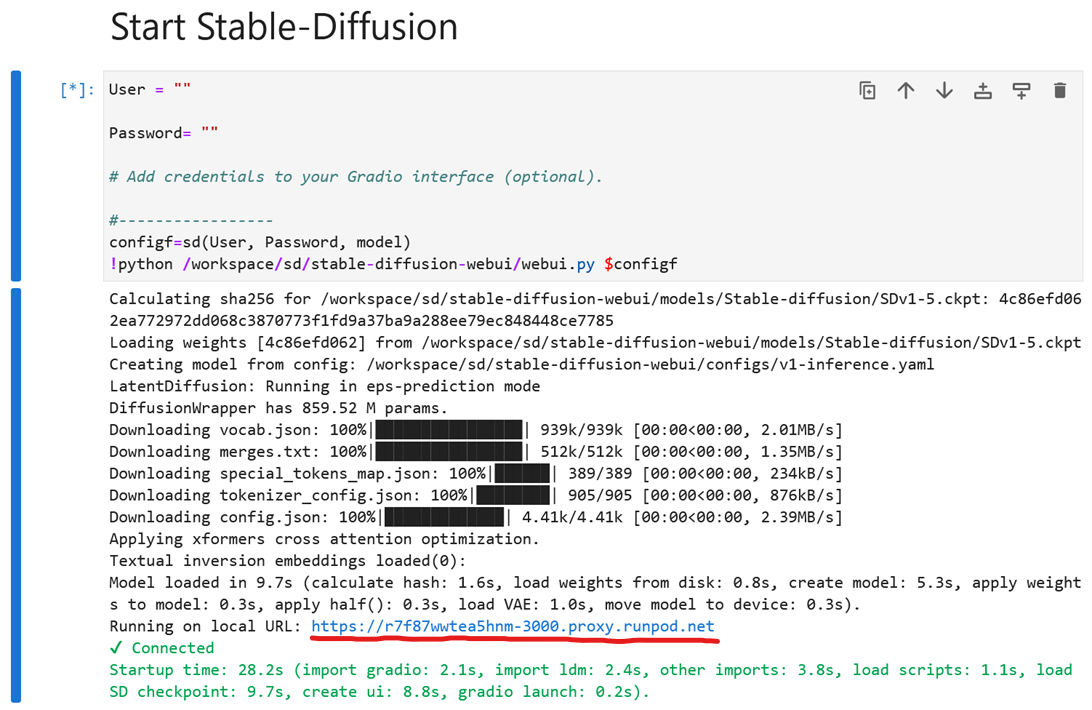
6. The cell labeled “Start Stable-Diffusion” will launch Automatic1111 on your pod. You can choose to set login credentials for this instance, but they are completely optional. Once you run the cell, the output will provide a link to access it. (the blue link ending in “.proxy.runpod.net” underlined in the screenshot below). Click it to get started with Automatic1111 in a new tab.
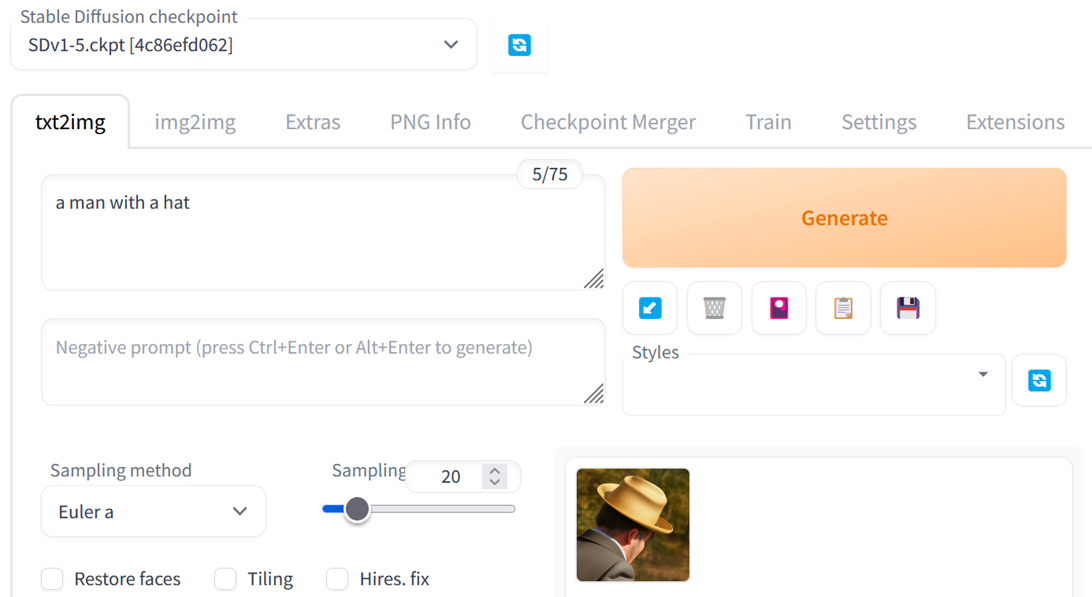
7. From here the Automatic1111 interface will run and work as it would on a local installation.
8. Once you are finished working with Automatic1111, if you have a Huggingface account, you can update and run the last cell with your Huggingface write token to back-up your Stable Diffusion content to Huggingface. It can be reloaded by editing the second cell the next time you run this notebook. If you don't have an account or have no need to back up your session's content, this step is also optional.