Using RunPod's DreamBooth Endpoint to Make Custom Generated Images
DreamBooth provides a great way to take a Stable Diffusion model and train it to include a specific new concept (maybe your dog or a friend) making it capable of generating AI images featuring that concept. In a previous post we walked through using RunPod's template to set things and run them in a rather interactive way. You can read it to get a more in-depth feel for what DreamBooth can do and how it works. What if you wanted to build an app that could do this all automatically with just a couple of API calls? With RunPod's new DreamBooth endpoint you can, and we'll walk through a basic example here.
First, I'd like to mention the doc page for the endpoint. In this post we'll be going step by step and demo the endpoint using Postman to interact with RunPod's API, but there are examples there showing you the same tasks using Python, NodeJS, GO, and even basic cURL from your shell environment directly.
DreamBooth at its most basic will need two things:
- A set of training images of the concept you'd like to generate
- A prompt telling StableDiffusion what to generate using your customized model
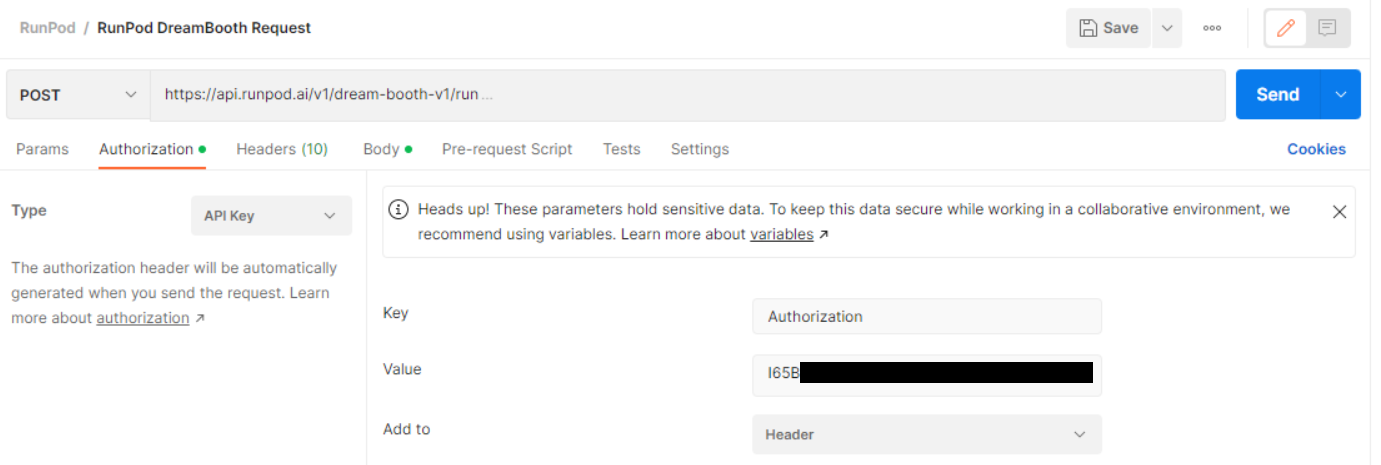
Additionally, you'll need to provide an API key associated with your RunPod account. You can generate one in your account settings. We'll put this in the "Authorization" header of our request. Don't share this key with others as it will associate requests with your account and you will be charged for them.
The Training Set
We'll need to prepare a simple training set to customize our model with. The number of images can be variable, but you can often get good results with only 6 or so. You'll need to crop your images to be square and resized (512 x 512 pixels is typical for most models).

You'll want to choose a unique keyword that your starting model hasn't associated with anything yet (for example we can choose "daiton"), and you'll want to name your images with that keyword, appended with a sequence of numbers in parenthesis. For example, we can name them "daiton (0).jpg", "daiton (1).jpg", "daiton (2).jpg", and so on.
For RunPod's DreamBooth endpoint, we'll also need to archive these training images into a zip file, and host it somewhere with a publicly accessible URL, so that the node that takes your request can access it. For this example, I'll use Catbox's temporary file hosting service, but for your product, you'll likely want to host the file somewhere controlled by you (like an AWS bucket or the like), especially if there are any privacy concerns regarding the contents. We'll send this URL to RunPod as "input.train.data_url" in the initial request.
The Prompt
This is the specific prompt you will use to tell StableDiffusion to generate an image. Be sure to include the unique keyword you chose to train on. For this example, we can use "photo of a daiton woman wearing a red dress on the moon". We'll provide this prompt to the API with "input.inference.prompt".
Sending the Job Request
Depending on the language you are using the code will vary. I'll be using Postman to demonstrate. As per the documentation, the URL for the DreamBooth endpoint is "https://api.runpod.ai/v2/dream-booth-v1/run", the request type will be POST.
In the header, we'll set two parameters:
- We'll let RunPod know we are by adding an "Authorization" header set to our RunPod API Key.
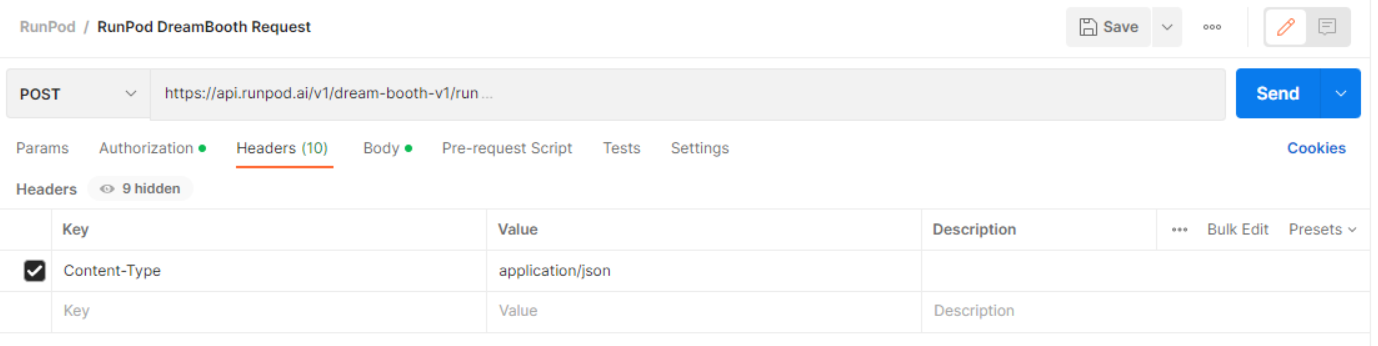
- We'll set the "Content-Type" as "application/json"
The RunPod API key can be set in Postman's "Authorization" tab:
The "Content-Type" can be set in Postman's "Headers" tab:
As mentioned in the previous section, we'll also add our two parameters, input.train.data_url and input.inference.prompt to the body of the request in JSON format. There are other parameters you might add at this point, such as inference.batch_size to generate more than one image, or inference.negative_prompt. Refer to the documentation for more.
Here is the body of the request, which we'll enter into Postman's "Body" tab :
{
    "input": {
        "train": {
            "data_url": "https://litter.catbox.moe/7lluoh.zip"
        },
        "inference": [
            {
                "prompt": "photo of a daiton woman wearing a red dress on the moon"
            }
        ]
    }
}
With all this set, we can then hit "Send".
If everything is entered correctly you should get a response similar to the following:

You can see we get two values back. The "id", "e78c4804-f2c4-4662-bbf4-0296c6818622" in this case, is the job id that we'll use to reference our request. The "status" tells us "IN_QUEUE", which tells us our job is waiting for a node to be available to take it.
To check the status of the job afterwards and/or receive the output, we can use another API endpoint. As per the documentation, the target URL for this is "https://api.runpod.ai/v1/dream-booth-v1/status/{REQUEST_ID}" where we'll replace {REQUEST_ID} with the job id we received with our request's response. The request type this time will be "GET".
Again, we'll set up the "Authorization" and "Headers" to the same parameters as before, setting our API key and the content type as JSON. We won't need to send anything in the body this time.
This request will serve two purposes. While the job is queued or processing, we will receive a response like the following:
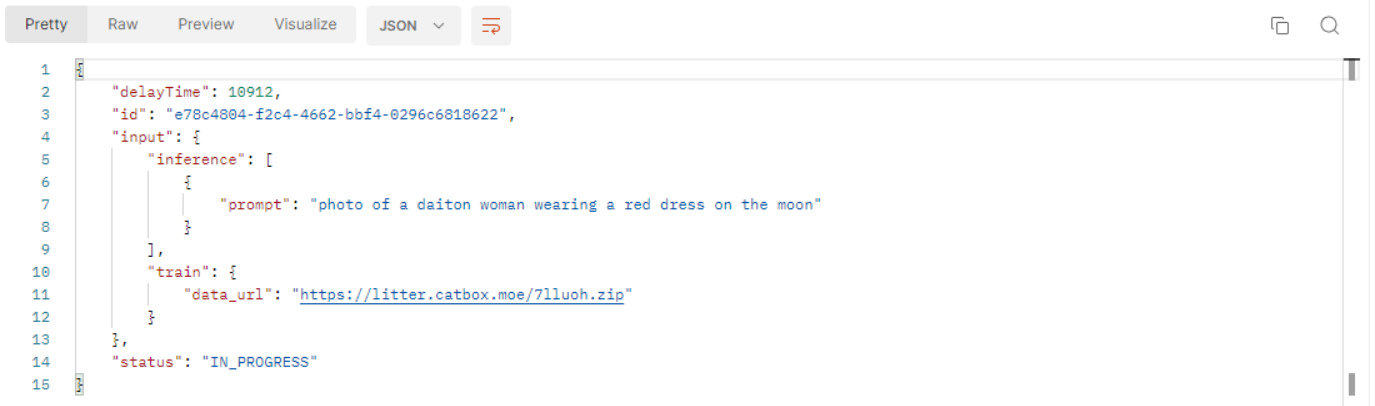
Here we get a few values in response. The "input" field repeats the body of the request we made. The "id" and "status" are the same as before, this time the status tells us the job is "IN_PROGRESS", meaning a node has taken our job and is currently training and generating our output for us. The "delayTime" field tells us how long the job has been waiting so far in milliseconds. This sort of DreamBooth training and generation job will take a few minutes to process once a node has taken it.
We can periodically make this second API call to keep an eye on the job's status. Eventually the job will complete, and we'll receive a slightly different response similar to the following:
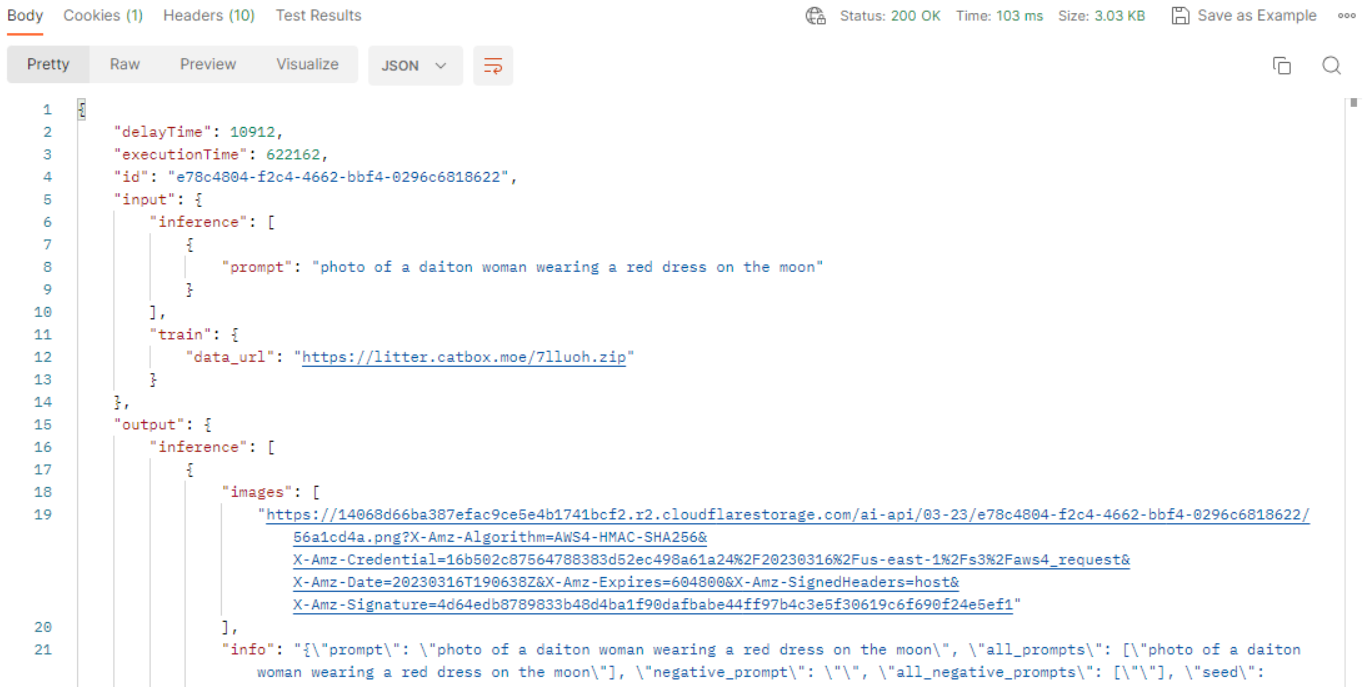
This time, the job has finished. The "status" field tells us the job is "COMPLETED", and we additionally get an "executionTime" field telling us how long the job took in milliseconds. More importantly, we have our output in the "output" field. In "output.inference.images" we get a URL to access and download each of our generated image(s). In Postman we can Ctrl+Click on the URL to open it and see our results:

We also get "output.info" and "output.parameters" that give us a lot more information on how Stable Diffusion was configured to produce our output.
More Advanced Queries
The example above just scratches the surface of the flexibility you have with RunPod's DreamBooth endpoint. Refer to the documentation to see all of the parameters that can be set to your initial API call to change the way DreamBooth trains and Stable Diffusion generates your image.
A couple that are worth mentioning here are "input.train.hf_model" and "input.train.ckpt_link". These allow you to choose a different model to start your DreamBooth training from. The first, you can provide with a Huggingface repository and model (e.g. "andite/anything-v4.0"). In the second, you can provide the URL of any model in ckpt form that is publically accessible to start from, such as ones you trained yourself.
The "input.inference.batch_size" parameter is also useful to allow you to generate more than one image in a request.
In Summary
Hopefully this guide has been useful to see how RunPod can be used to customize models and use them to generate images based on your own input.