Upscaling videos using VSGAN and TensorRT
In today's increasingly digital age, enhancing video quality has become more important than ever. With the help of VSGAN, a repository dedicated to super resolution models and video frame interpolation, we aim to achieve the fastest inference possible while maintaining high-quality results.
Before diving into this guide, it's essential to ensure that you have SSH keys set up on your RunPod, as we will be using SSH to access a Pod. To learn how to set up terminal access on RunPod, follow this step-by-step guide: How to set up terminal access on RunPod. Additionally, the VSGAN docker repository requires CUDA 12+ on your Pod for seamless operation.
As you embark on your video upscaling journey using VSGAN and TensorRT, it's crucial to choose the right GPU for optimal performance. We recommend using GPUs such as the RTX 3090, RTX 4090, A100, H100, or most RTX-based Ampere cards. These GPUs are known for their impressive performance and will benefit significantly from the performance boost provided by TensorRT. By selecting the right GPU, you can achieve faster and more efficient upscaling results, enhancing your overall experience with VSGAN and TensorRT.
In this guide, we will be using the RunPod template available at the following link: RunPod Template. Once you've deployed your Pod using the provided template, follow these simple steps to connect to your Pod using SSH:
- Locate the "Connect" button on the My Pods poge.
- Click on the "Connect" button to reveal the SSH connection details.
- Use the provided information to establish an SSH connection to your Pod.
With a successful SSH connection to your Pod, you're now ready.
To start upscaling videos we first need to make sure we have model we going to use for the process. You can use script to predownload models using download_models.sh or with download_onnx_models.sh. In this guide we will be using custom Real-ESRGAN anime model.

Now that we have model downloaded it's time to convert it into ONNX model. To do this we need edit convert_compact_to_onnx.py script. Open it using nano:
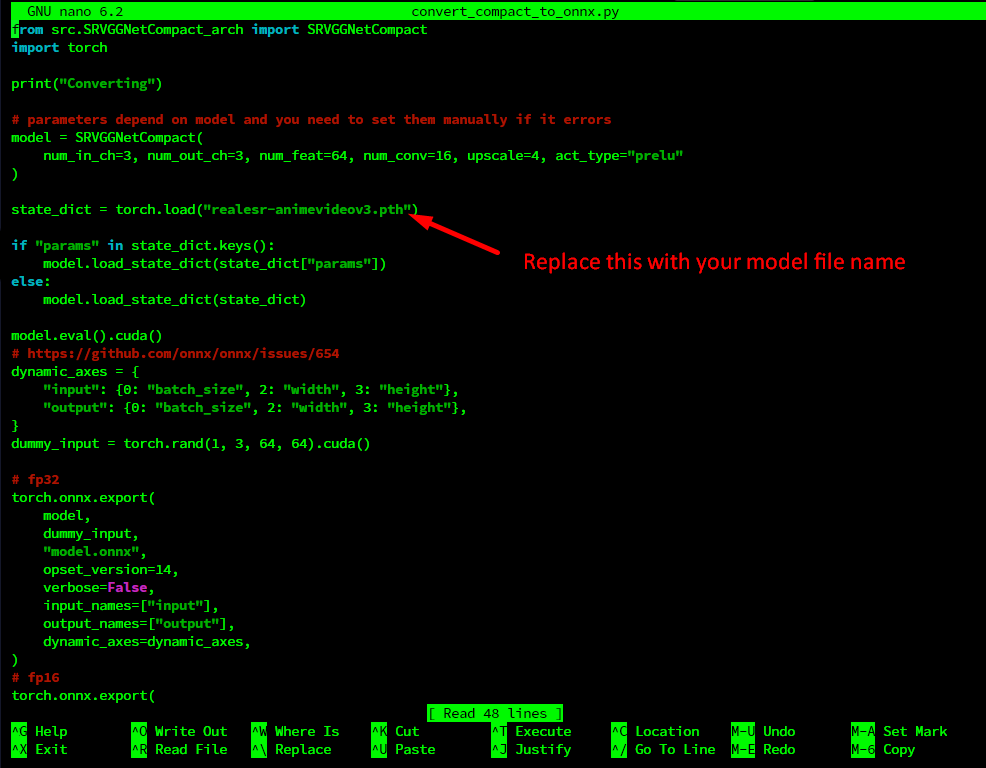
To save the changes press ctrl+O then ctrl+x
Then run script with python convert_compact_to_onnx.py
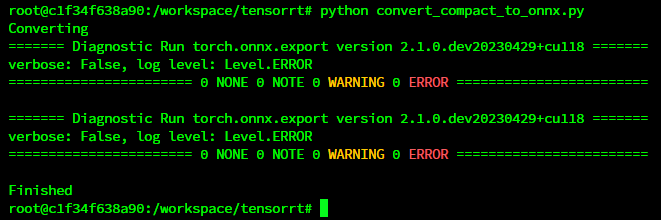

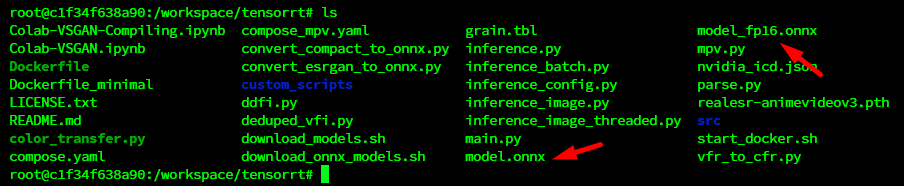
After script is finished you should get 2 ONNX files
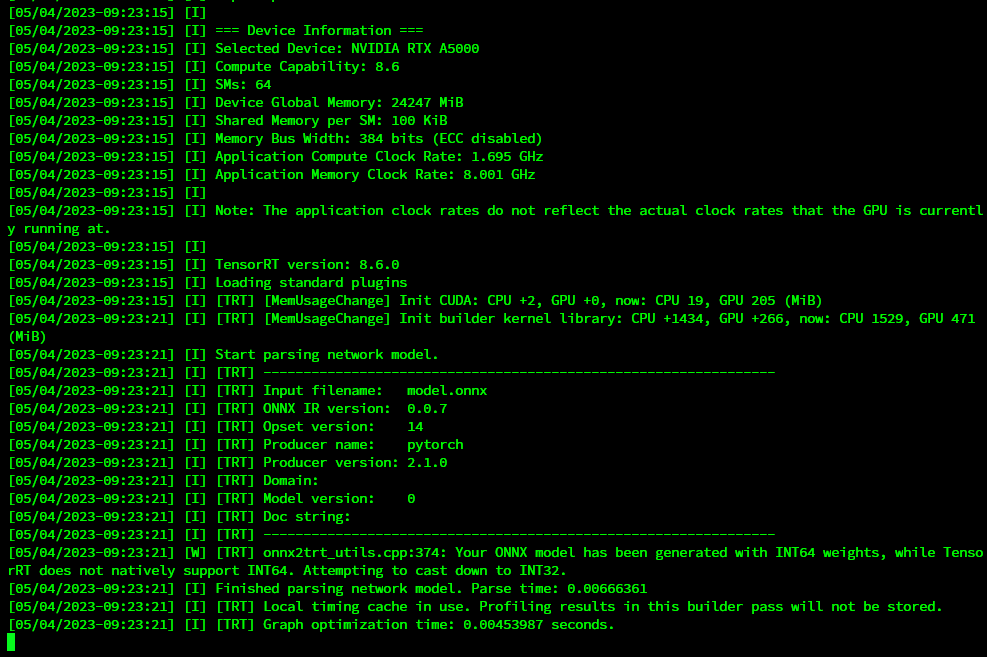
Now we need convert our onnx model into engine for the best performance.
Good default choice:
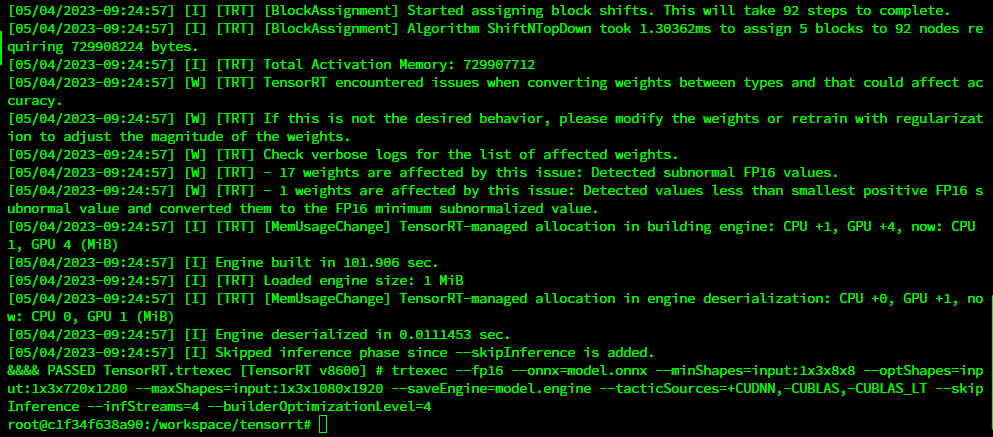
trtexec --fp16 --onnx=model.onnx --minShapes=input:1x3x8x8 --optShapes=input:1x3x720x1280 --maxShapes=input:1x3x1080x1920 --saveEngine=model.engine --tacticSources=+CUDNN,-CUBLAS,-CUBLAS_LT --skipInference
With some arguments known for speedup (Assuming enough VRAM for 4 stream inference):
trtexec --fp16 --onnx=model.onnx --minShapes=input:1x3x8x8 --optShapes=input:1x3x720x1280 --maxShapes=input:1x3x1080x1920 --saveEngine=model.engine --tacticSources=+CUDNN,-CUBLAS,-CUBLAS_LT --skipInference --infStreams=4 --builderOptimizationLevel=4
Note: This step takes some time based on model you are using for Real-ESRGAN models it should be like ~10 min where ESRGAN may take ~30 min to build.
Engine models are build for specific GPU enviroment so you cant reuse engine build on RTX A5000 for example on A6000.
By following these steps, you'll be able to convert ONNX models into engines and leverage the power of TensorRT for efficient video upscaling using VSGAN.
Now that we have engine build we can move to upscaling process:
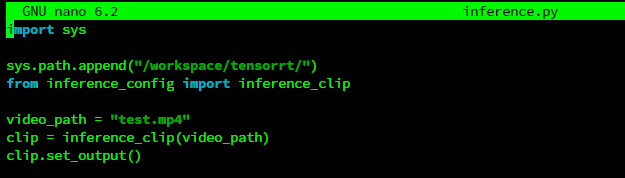
To start we need specify the path to video we want to upscale
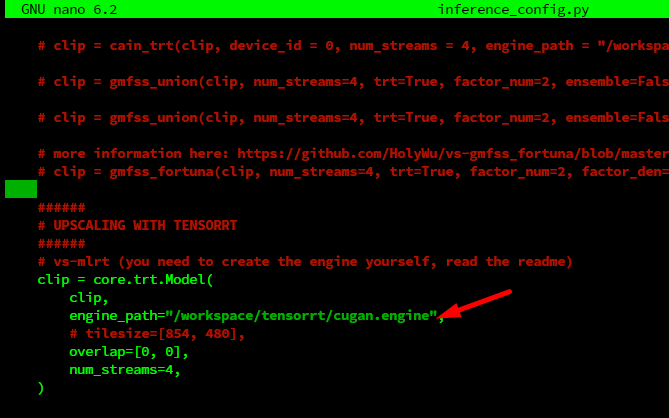
Now we need to edit inference_config.py file to set models that we going to use
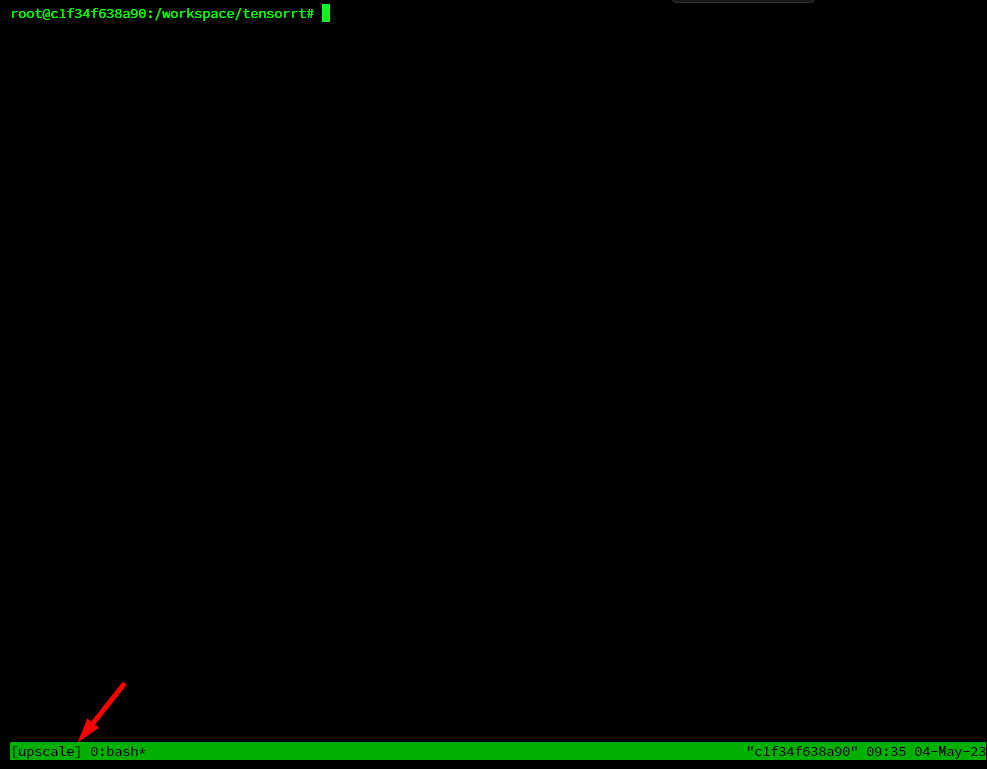
As a upscaling process takes some time we want it to run it as background process so it wont be lost if we disconnect during SSH. To do this we going to use tool called Tmux.
Let's create new seasion using command tmux new -s upscale
To start upscaling we can use command like this:
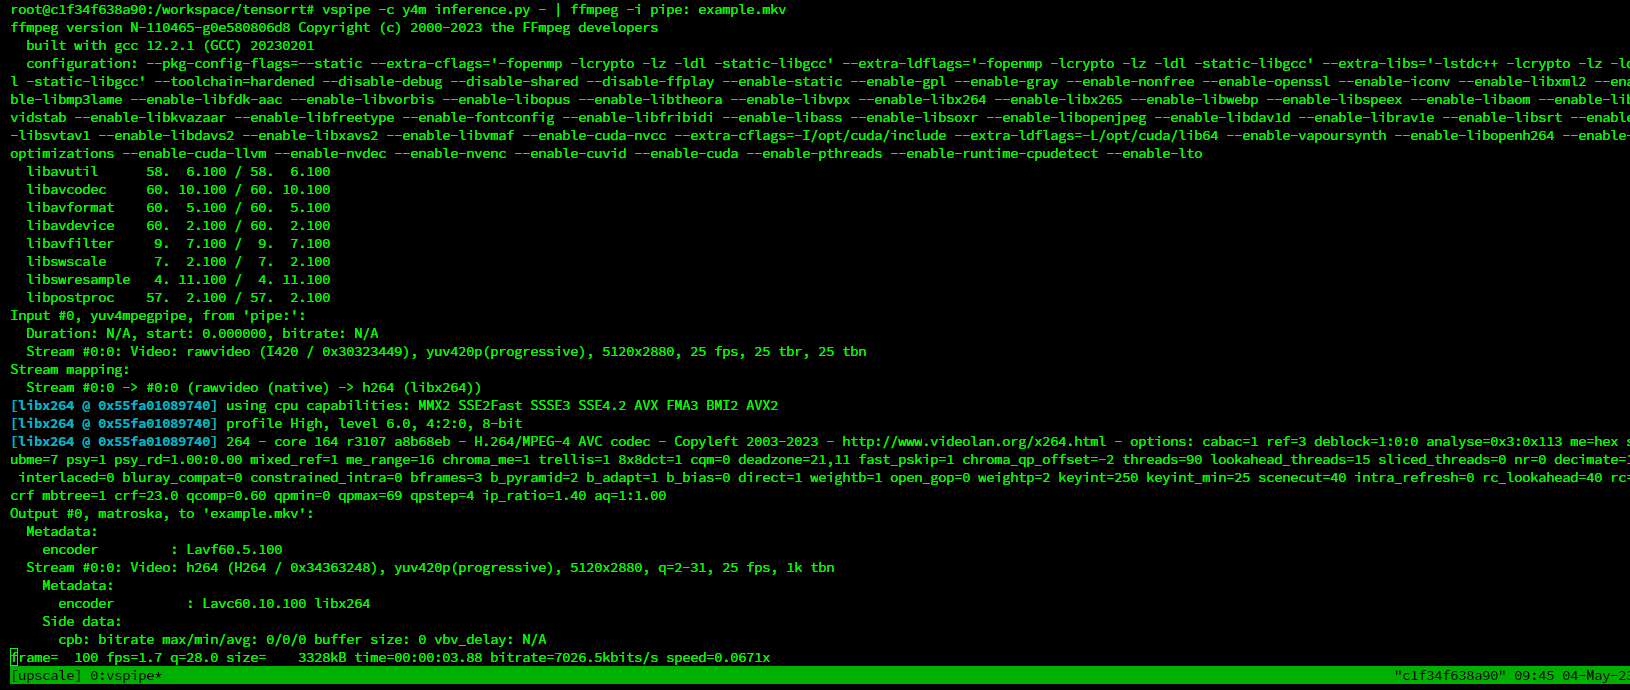
vspipe -c y4m inference.py - | ffmpeg -i pipe: example.mkv
You can edit parameters of ffmpeg output in this case it will save file in current folder under name example.mkv
List of possible errors you can get:
1.ImportError: cannot import name 'build_from_cfg' from 'mmcv' (/usr/local/lib/python3.10/dist-packages/mmcv/init.py)
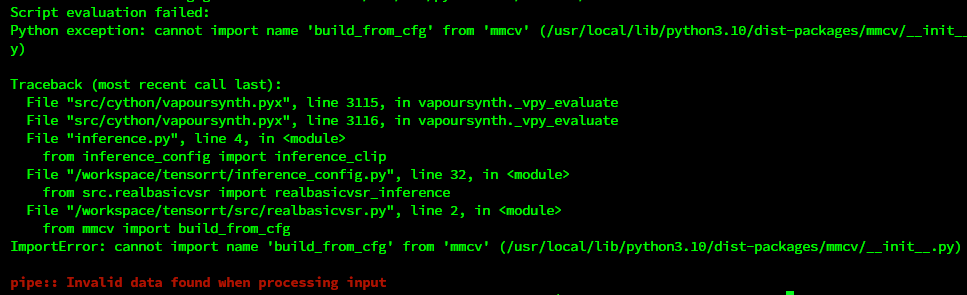
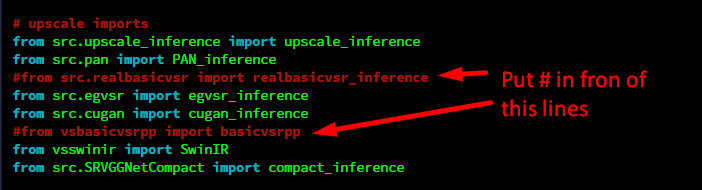
You need to edit inference_config.py config and hash selected lines:
Then you can run command again and if everything is fine processing should start.
After process is done file is going to be on /workspace/tensorrt/
As we conclude this exciting exploration of video upscaling using VSGAN and TensorRT, we hope that you've found this guide informative and valuable. With the right GPU, a properly configured RunPod environment, and an understanding of how to convert ONNX models into engines, you are now well-equipped to harness the potential of these cutting-edge technologies.
Remember, the key to success lies in experimentation and continuous learning. So, go ahead and upscale your videos to achieve stunning results, and don't hesitate to share your experiences and insights with the community. We look forward to seeing the remarkable transformations you'll create using VSGAN and TensorRT. Happy upscaling!
Before:

After:

More examples can be found here: https://portfolio.madiator.com/