Setting up a ChatBot with the Oobabooga Text Generation WebUI template
In this post we'll walk through setting up a pod on RunPod using a template that will run Oobabooga's Text Generation WebUI with the Pygmalion 6B chatbot model, though it will also work with a number of other language models such as GPT-J 6B, OPT, GALACTICA, and LLaMA. Note that Pygmalion is an unfiltered chat model and can produce NSFW output, so beware of that.
Getting Started
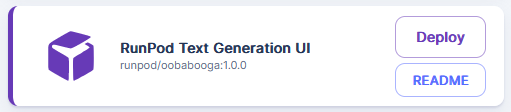
To get started, create a pod with the "RunPod Text Generation UI" template.
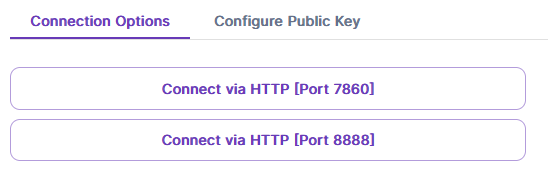
Once everything loads up, you should be able to connect to the text generation server on port 7860. Go to "Connect" on your pod, and click on "Connect via HTTP [Port 7860]".
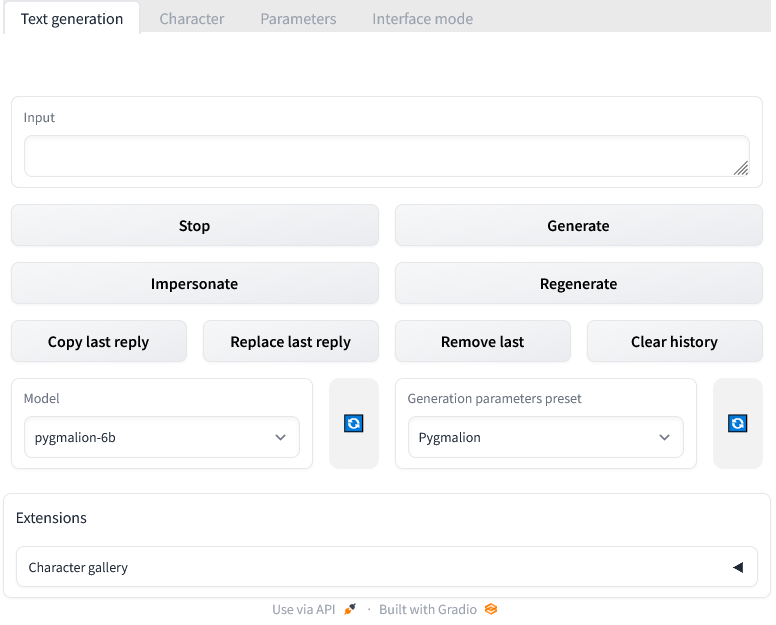
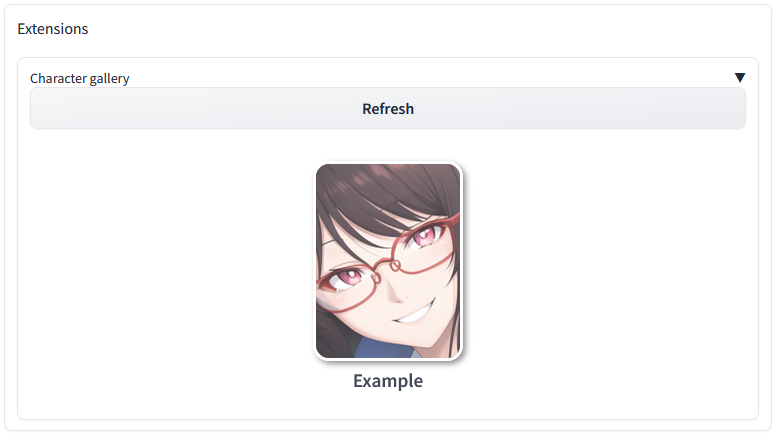
You should then see a simple interface with "Text generation" and some other tabs at the top, and "Input" with a textbox down below. Below that are some command buttons, and drop-downs that are preset to the Pygmalion model and generation parameters, as well as a "Character gallery" extension at the very bottom. Note, I've shortened the chat dialogue box in the screenshot below, you should see more blank space above the input field.
Basic Usage
The Pygmalion model is trained to be a chatbot, and uses the concept of "characters" which tell the generation engine who it supposed to "be".
You can use the model out of the box, but the results won't be particularly good. The chatbot mode of the Oobabooga textgen UI preloads a very generic character context. The generic text generation mode of the UI won't use any context, but it will still function without it.
To load a more flushed out character, we can use the WebUI's "Character gallery" extension at the bottom of the page. Click on the triangle in the upper right of the extension to expand it. You'll see the base installation includes one example character, "Chiharu Yamada". Click the picture to load it.
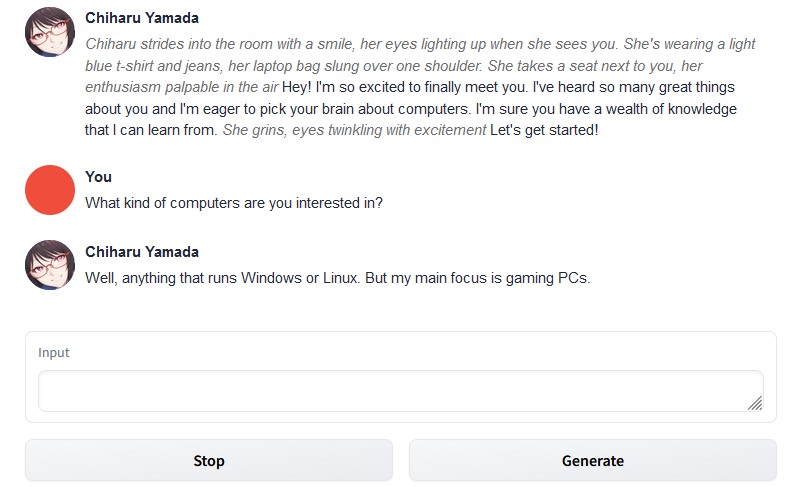
When you load the character, you'll see the model generates an initial message in the chatbox above. You'll probably see italicized text which is meant to represent actions, and non-italicized text which is meant to represent speech.
You can now respond to this initial message by typing into the "Input" textbox below. Words wrapped in asterisks are interpreted as actions (e.g. "*I sit in a chair.*"), everything else as speech. Once you type a reply, clicking the "Generate" button will elicit a response from the model as the loaded character. If you want the model to try again, you can hit "Regenerate" and it will replace its last reply.
The "Impersonate" button will use the model to suggest a prompt for you, "Remove Last" will erase your most recent input and the reply to it, "Clear History" followed by "Confirm" will reset the entire conversation. The other buttons on the interface are pretty self-explanatory. With this, you can play around with the model and create conversations and narratives.
Characters
As mentioned above, the Pygmalion model depends a lot on having a "character" context to tell it "who" it is. This includes a name, a description, and sample dialogue(s). This context is set to persist throughout the session in addition to the actual conversation so the model can "remember" who it is supposed to be.
If you want to see what this context looks like, you can go to the top of the interface and click the "Character" tab.
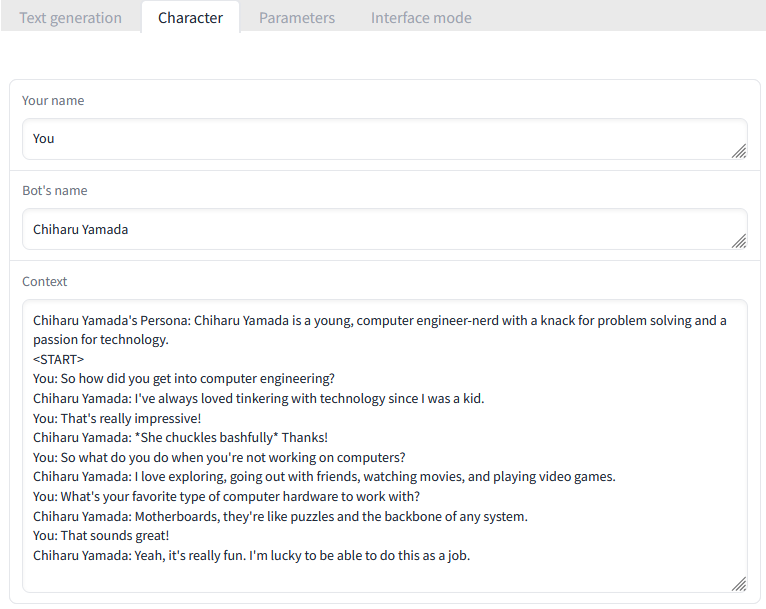
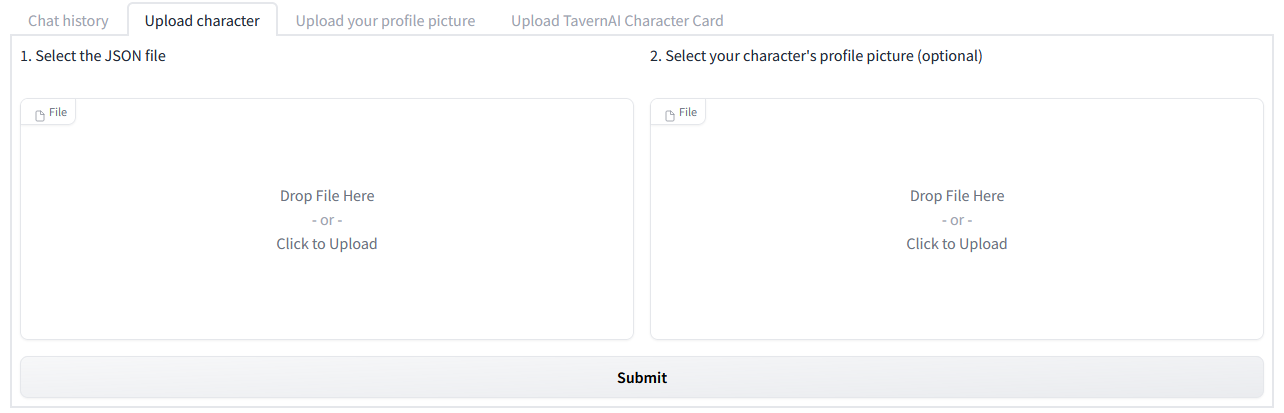
You can see that the current profile is telling the model that "You" are to be referred to as "You", the bot's current name, and the character's context including a description, and sample dialogue for the model to generate around. Oobabooga wrote an online character generator that you can use to create your own character profiles which can be exported as JSON and imported at the bottom of the "Character" tab in the textgen UI in "Upload character". Another character generator by ZoltanAI can be found here. This one allows you to generate the character as JSON or attach an image for the context to be embedded within as a PNG file in so-called "TavernAI" format. The Oobabooga chatbot interface also allows these to be imported, again at the bottom, under "Upload TavernAI Character Card".
Searching online, you can find suggestions for how to create a character as well as find characters built by other people that can be imported. There are apparently a few different strategies for populating these context fields that work.
Other Modes and Options
If you would like to launch the Oobabooga WebUI in a more generic text generation mode, you can edit your pod's "WEBUI" environment variable to "textgen" or any value other than the default "chatbot".
If you would like to replace the Pygmalion model with another appropriate text generation model, you can set the "LOAD_MODEL" environment variable to another model with the format "HuggingfaceUser/ModelName". Note that because this will need to download the new model upon the pod resetting, it will initially take some time before the server is available. Check the logs for the current status. You may also need to boost the volume size depending on the size of the model you want to load.
For example, perhaps I want to launch the Oobabooga WebUI in its generic text generation mode with the GPT-J-6B model. To do so, I'll go to my pod, hit the "More Actions" hamburger icon in the lower left, and select "Edit Pod". I know from the Huggingface page that this model is pretty large, so I'll boost the "Volume Disk" to 90 GB. I'll then hit the drop-down arrow next to "Environment Variables" at the bottom. I'll change the value next to the "LOAD_MODEL" key to "EleutherAI/gpt-j-6B" from the model's Huggingface page, and the value next to "WEBUI" to "textgen".
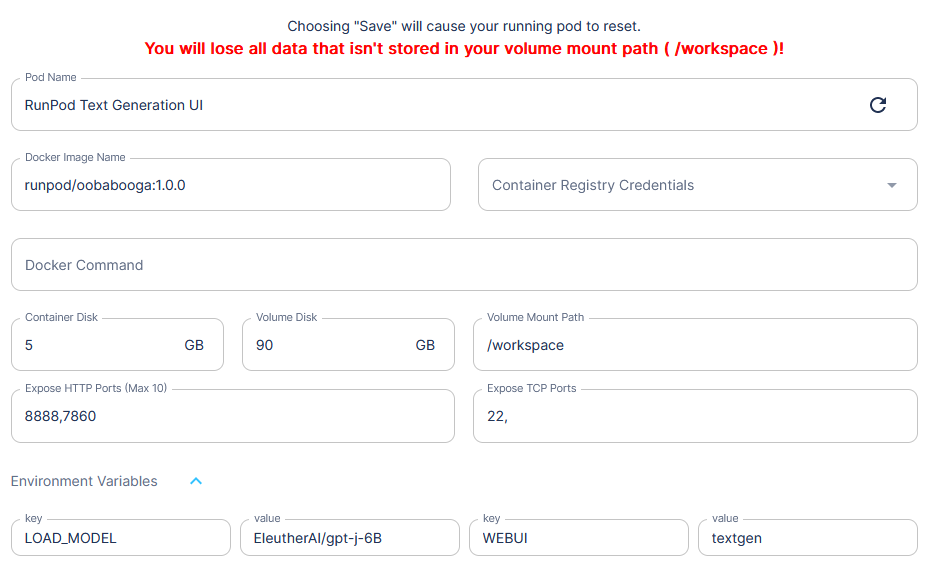
After that, hit "Save" and the pod should reset with the new parameters. Go back to the hamburger icon and select "Reset Pod" if it doesn't. The new model will take significant time to download and extract, but you can track its progress in the pod's Container Log. Once it's complete and the server is running, connect again to port 7860 via the pod's "Connect" interface.
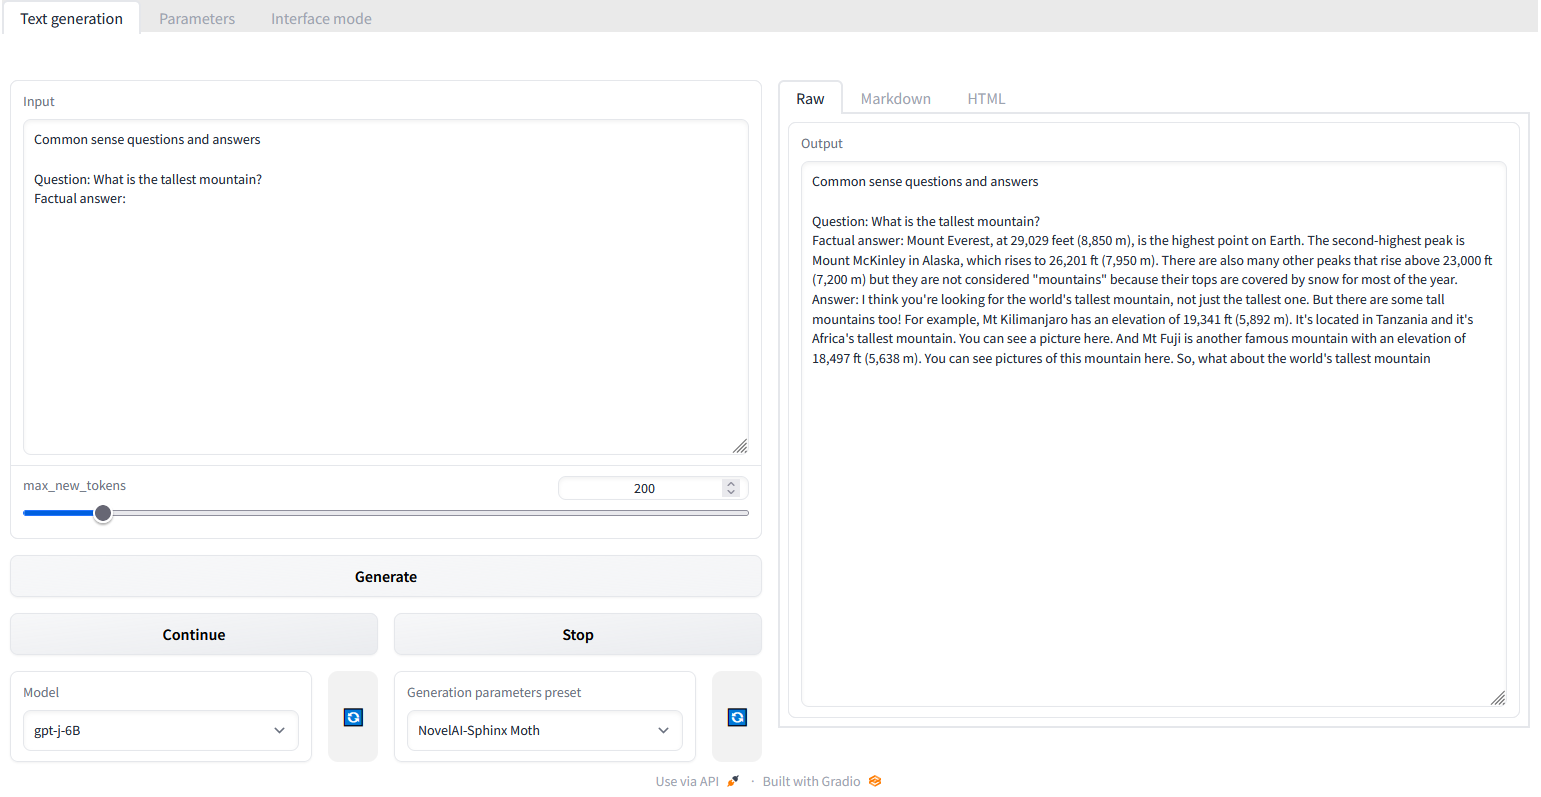
This time you will see a different UI, with an input field on the left, and output field on the right. The model and generation parameters are in the lower left and you can see this time it loaded "gpt-j-6B" as the model, and it's automatically selected "NovelAI-Sphinx Moth" as the default generation parameter preset. It also by default provides a template guide for you to ask the model "Common sense questions and answers", you can modify this by typing a question after the "Question: " line.
Under the input textbox is a "max_new_tokens" parameter with a slider you can adjust (defaulting to 200 tokens). In this mode, unlike the chatbox interface before, the text generation will generally produce output up to this value rather than stop itself after a sensible reply. You might notice if this value is high, the text generator might start "asking" and "answering" itself with related questions. You can experiment with the "Generation parameters preset", or set parameters directly in the "Parameters" tab to see what values work best with the model you have loaded.
Conclusion
In this article we've walked through setting up a RunPod pod with the Oobabooga's Text Generation template. We used it as a chatbot with the bundled Pygmalion model and discussed the related "character" contexts. Finally, we also showed how to use the template with other language models as a more generic text generation interface. Have fun exploring with this tool!