Run Gemma 7b with vLLM on RunPod Serverless

In this blog, you'll learn:
- About RunPod's latest vLLM worker for the newest models
- Why vLLM is an excellent choice for running Google’s Gemma 7B
- A step-by-step guide to get Google Gemma 7B up and running on RunPod Serverless with the quick deploy vLLM worker.
Introduction to Google Gemma 7B and vLLM
Google’s Gemma 7B is the latest iteration of Google’s powerful open-source language models. It offers a robust balance between performance and efficiency, making it ideal for various use cases. While smaller than some of its larger counterparts, the Gemma 7B model provides strong capabilities without overburdening computational resources. This model performs well in benchmark tests, making it a solid choice for many applications.
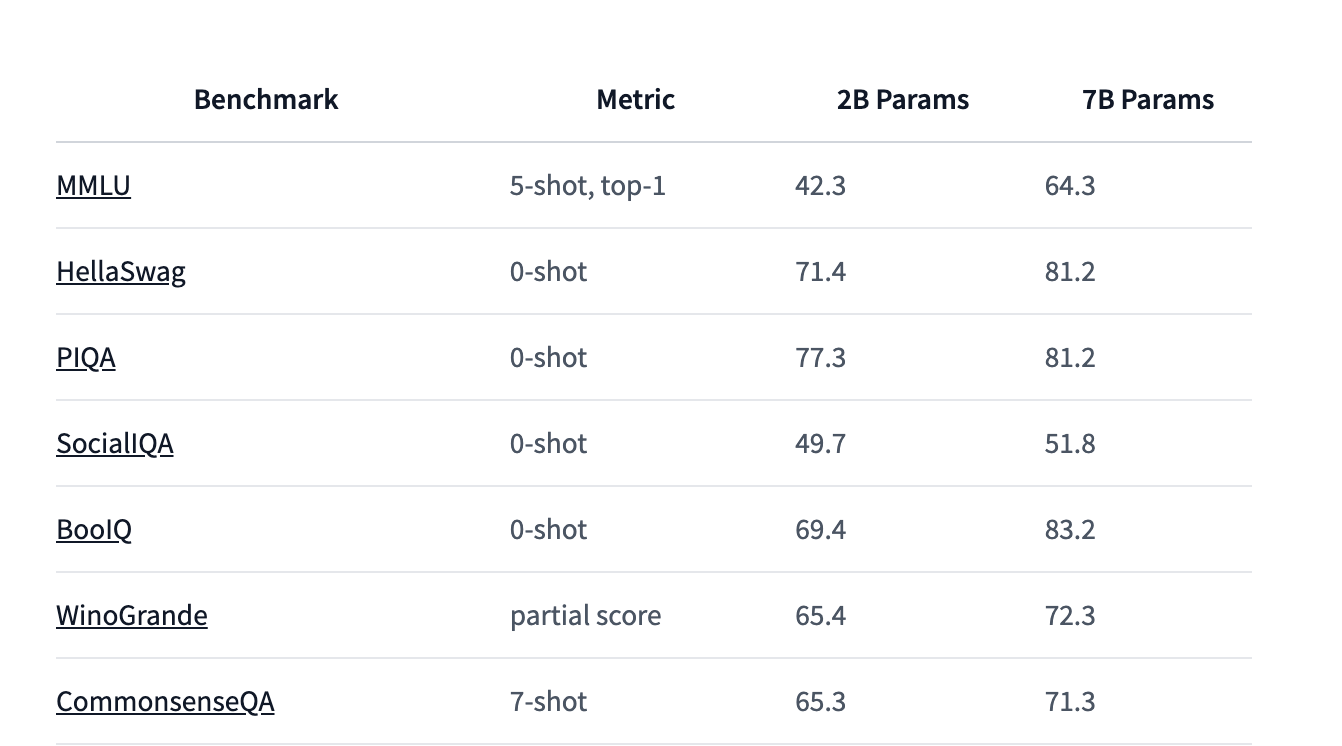
Why Use vLLM for Gemma 7B?
To run our Google Gemma 7B model, we'll utilize vLLM, an advanced inference engine designed to enhance the performance of large language models. Here’s why vLLM is an excellent choice:
- Unmatched Speed: vLLM significantly outperforms other frameworks, offering 24 times the throughput of Hugging Face Transformers and 3.5 times that of Hugging Face’s Text Generation Inference (TGI).
- Extensive Model Support: vLLM supports a broad range of language models and continues to expand. It is GPU-agnostic, allowing it to run on both NVIDIA and AMD hardware seamlessly, making it adaptable to diverse computational environments.
- Strong Community Support: With over 350 active contributors, vLLM benefits from a dynamic ecosystem. This community ensures rapid improvements in performance, compatibility, and overall user experience. New breakthrough models are typically integrated shortly after their release.
- User-Friendly Setup: With RunPod's quick deploy option, vLLM setup is incredibly easy.
The key to vLLM’s impressive performance lies in its memory management algorithm called PagedAttention. This technique optimizes how the model’s attention mechanism interacts with system memory, leading to significant speed improvements. For more details on PagedAttention, you can check out our dedicated blog on vLLM.
How to Deploy Gemma 7B with vLLM on RunPod Serverless
Follow this step-by-step guide with screenshots to run inference on Google Gemma 7B with vLLM in just a few minutes. This guide can also be applied to any large open-source language model—just swap in the model name and Hugging Face link in the code.
Pre-requisites:
- Create a RunPod account. You'll need to load funds into your account to get started.
- Choose your Hugging Face model and have your Hugging Face API access token ready.
Quick Deploy Gemma 7B with vLLM and Test with RunPod Web UI
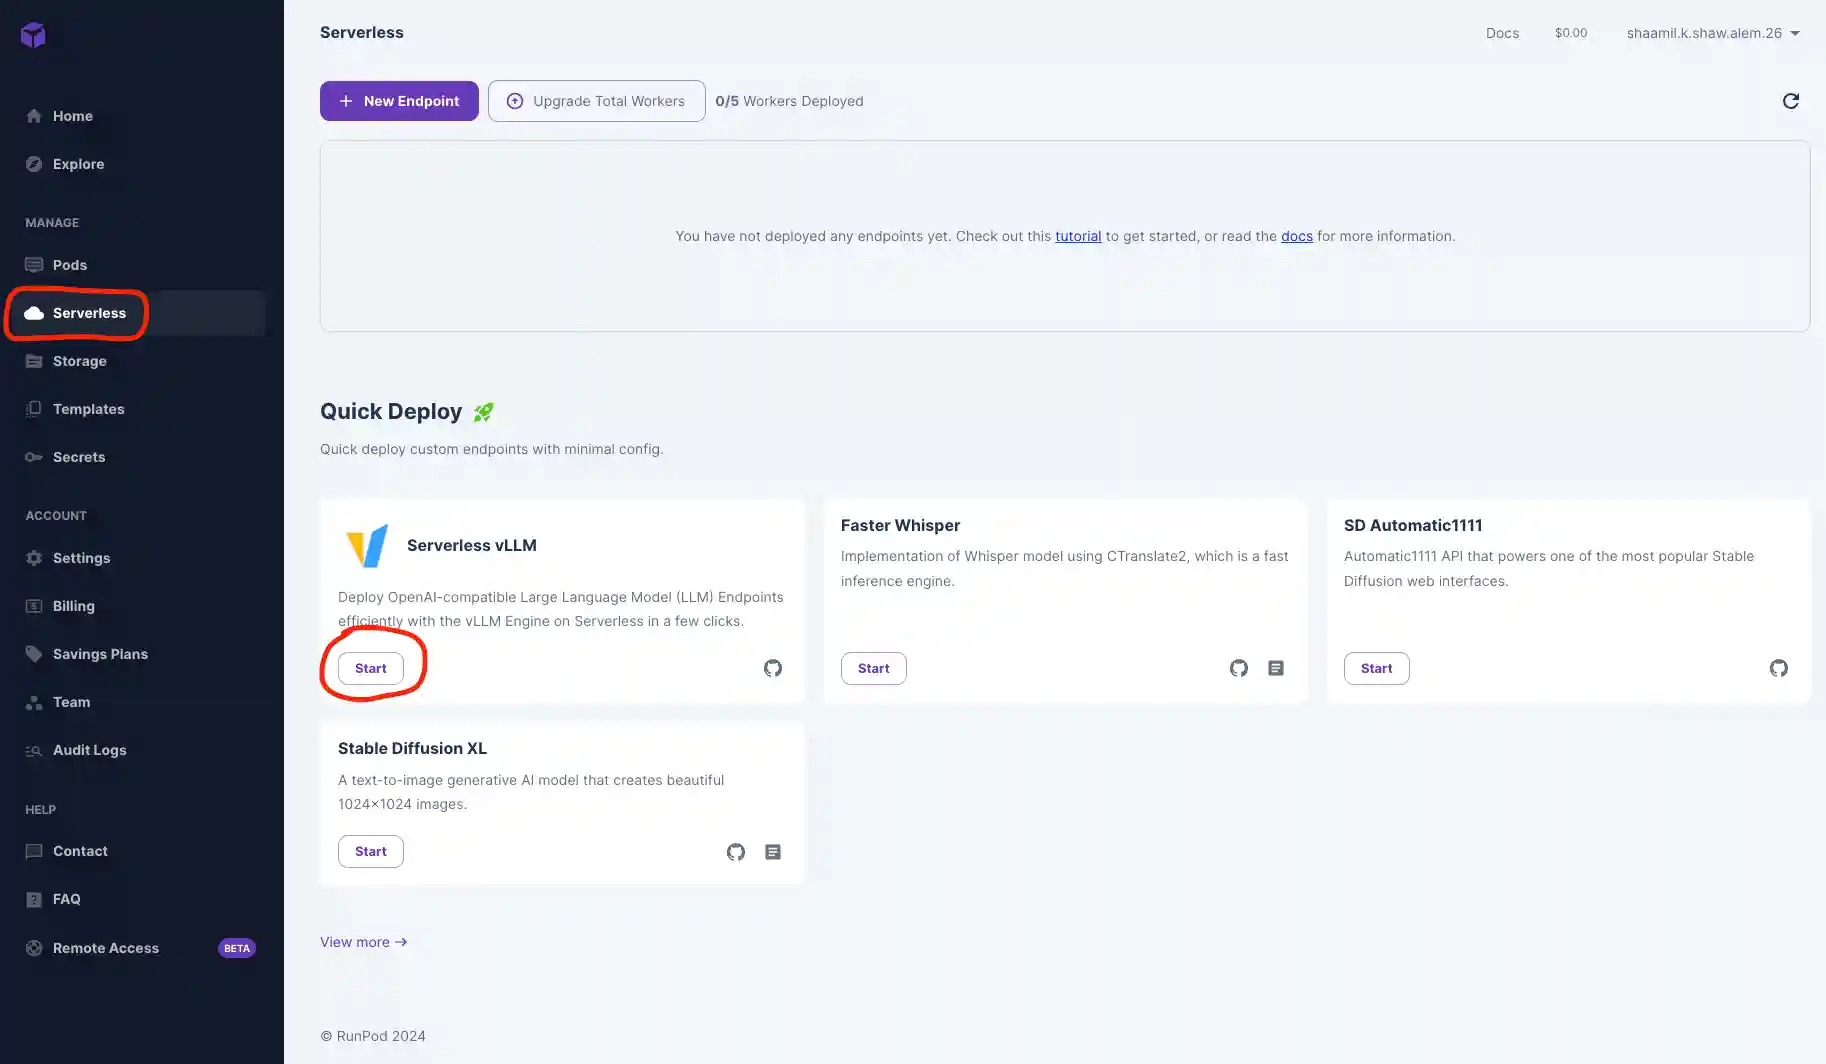
- Navigate to the Serverless tab in your RunPod console and click Start on the Serverless vLLM card under Quick Deploy. This automatically installs vLLM and sets it up as an endpoint.
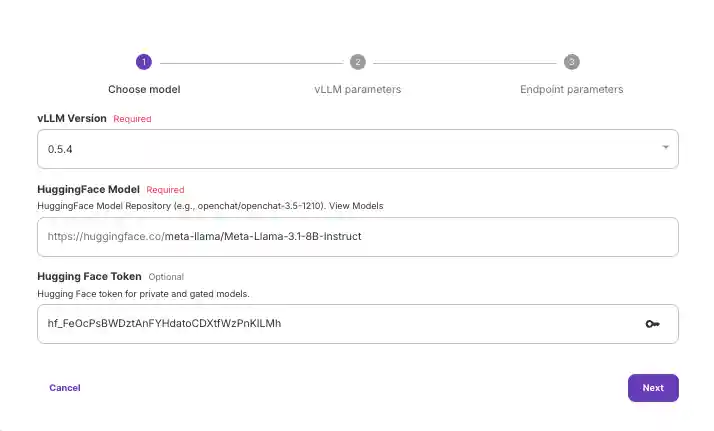
- Input your Hugging Face model and access token. You can obtain the access token from your Hugging Face account.
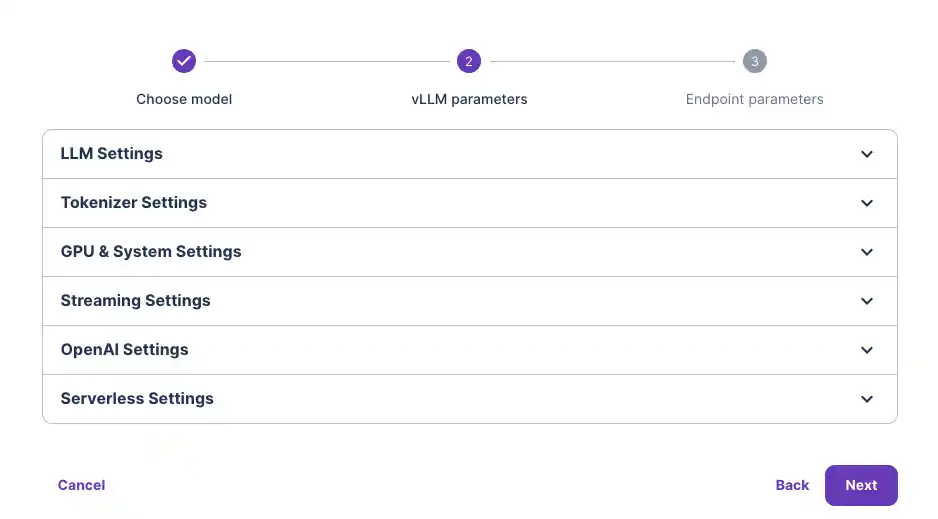
- Customize your vLLM model settings if necessary (not typically required unless you're using specific versions like GPTQ with quantization). For most users, the default settings will work fine.
- Select the GPU type you want to use. We recommend the 48GB GPU for the 7B model to account for model storage and system needs. You likely won’t need multiple GPUs unless you're running much larger models.
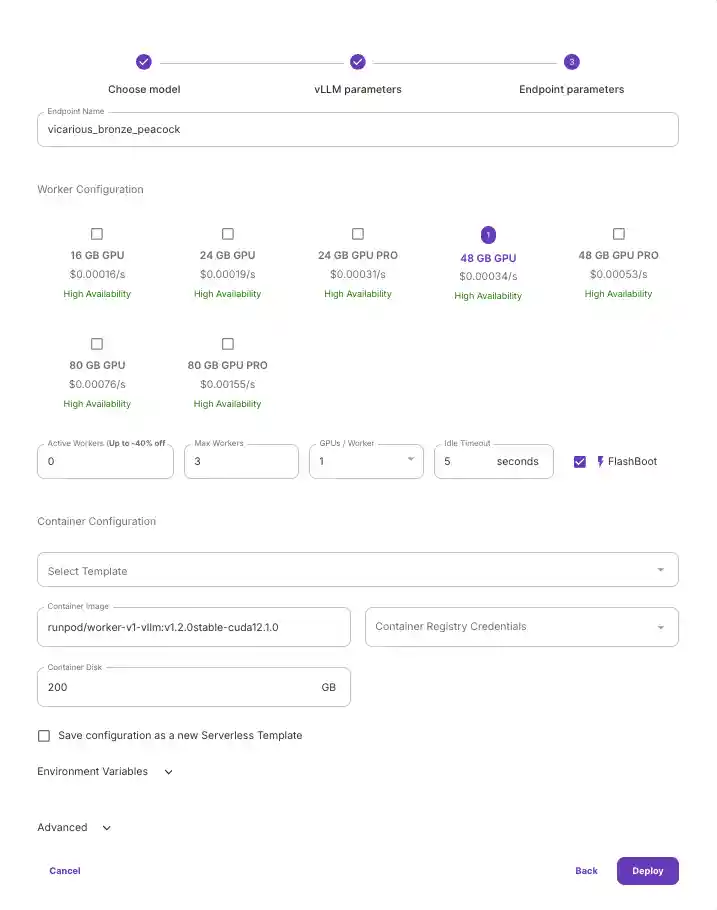
- Hit Deploy.
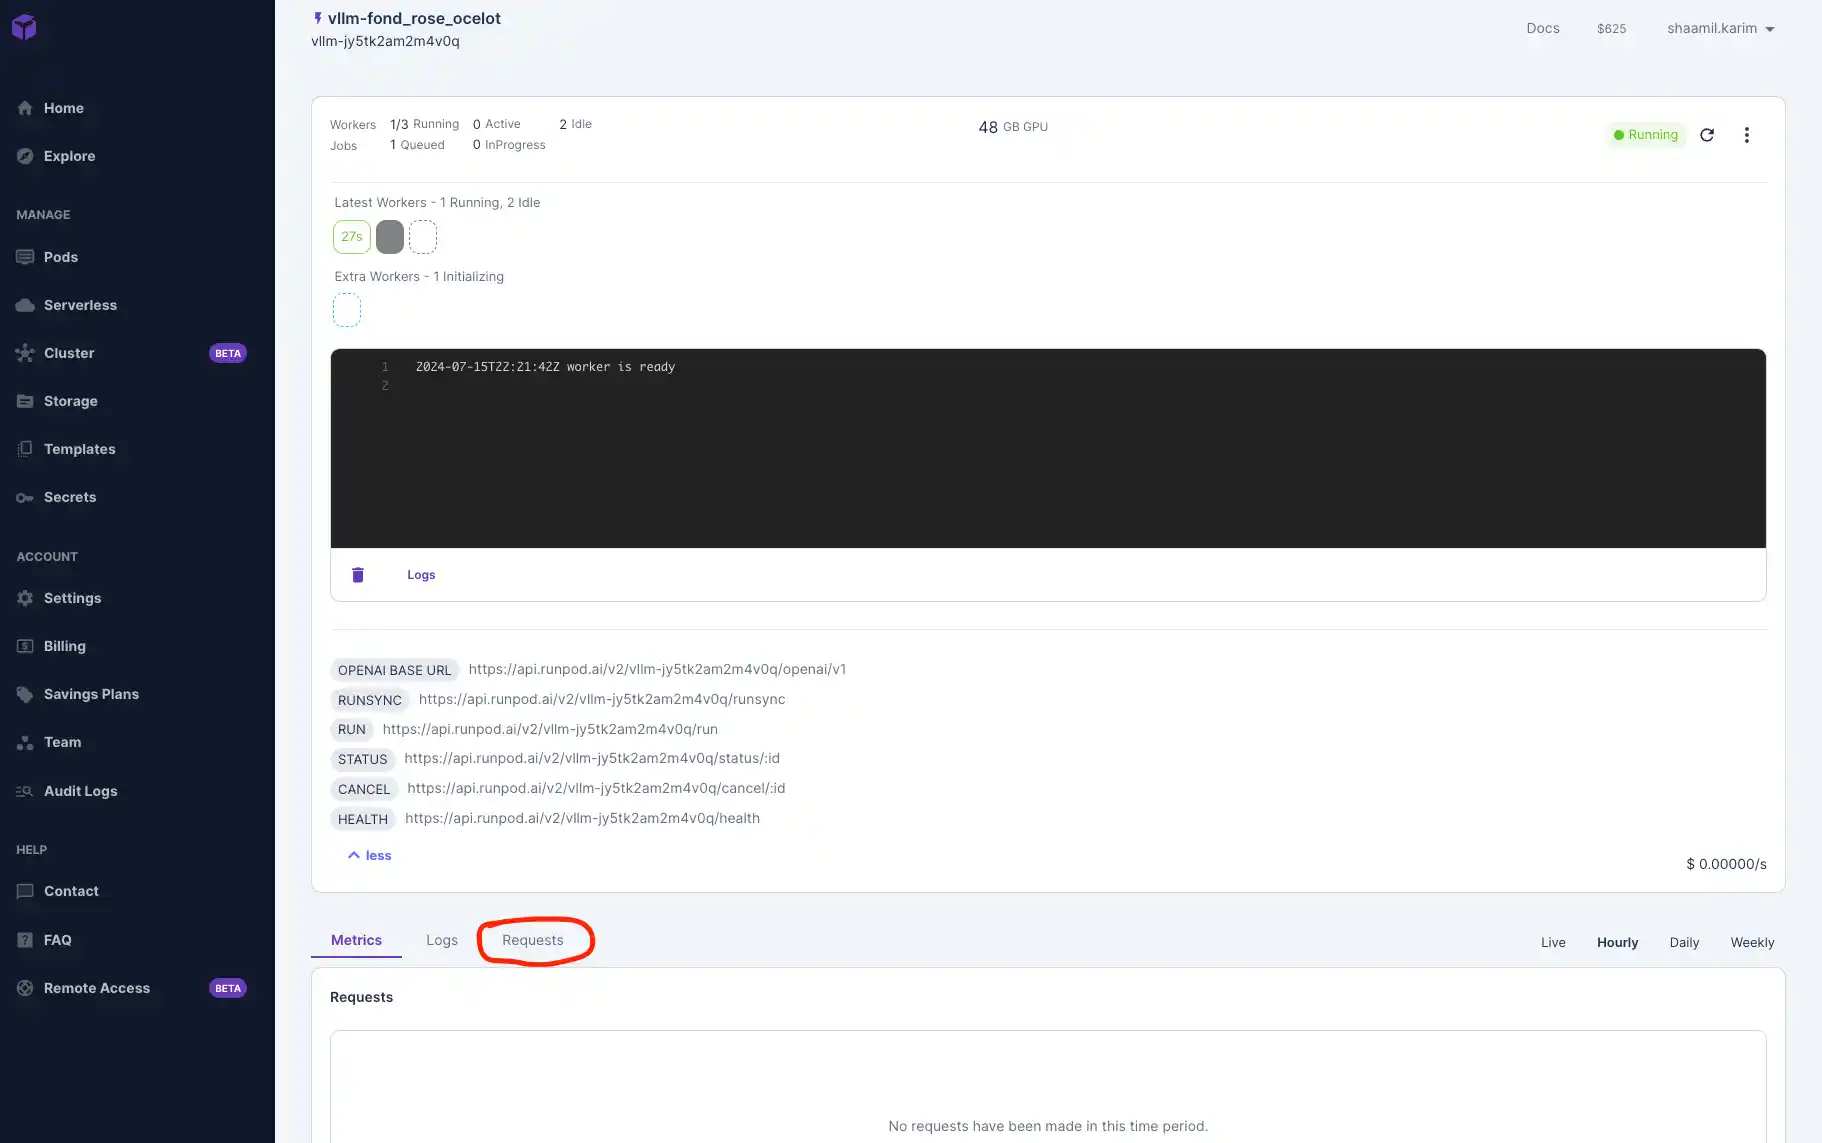
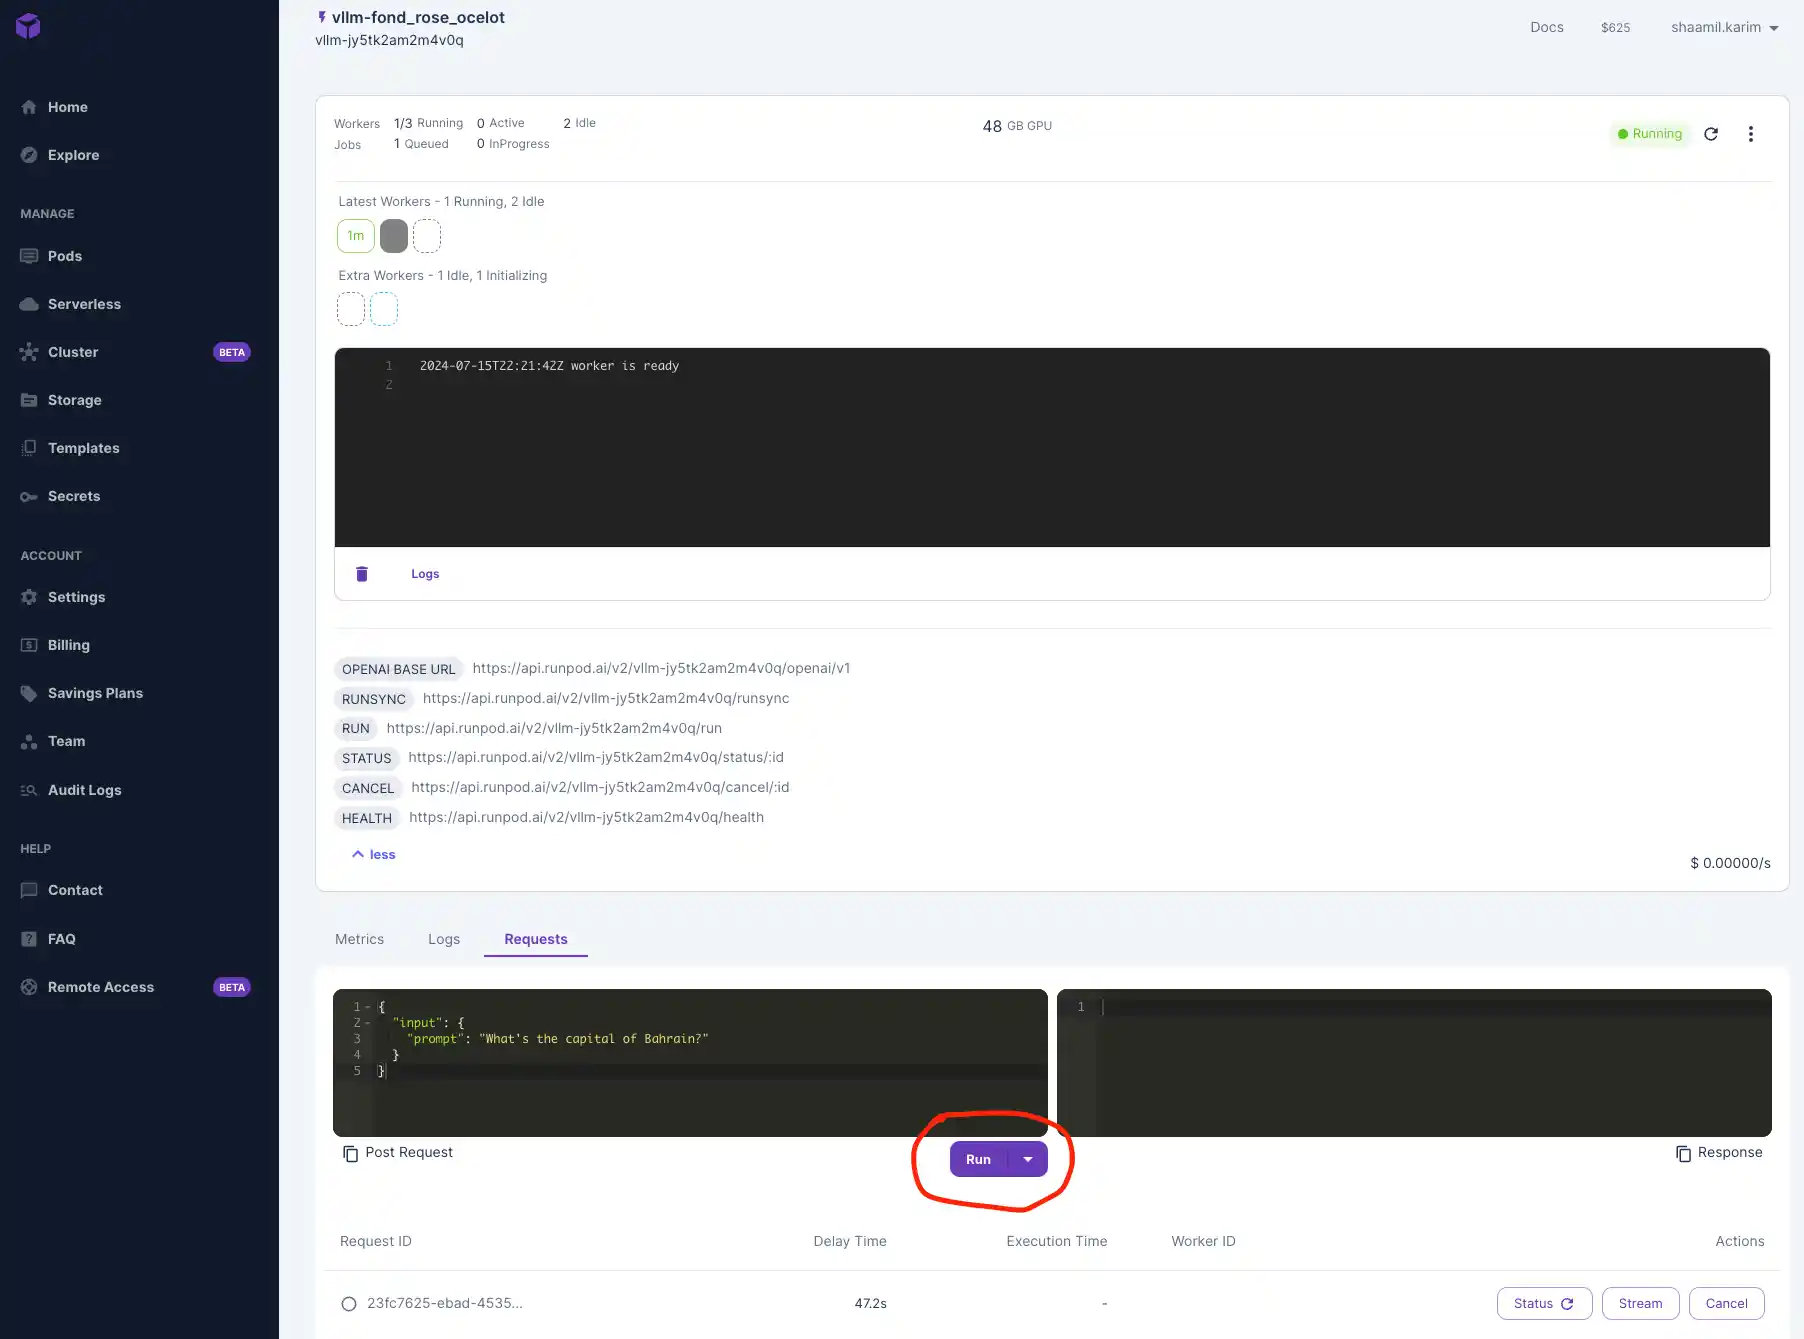
Once your model is deployed, navigate to the "Requests" tab to test that it's working. Input a prompt and click Run to see your outputs below.
Connect to Your Serverless Endpoint and Test Externally
We'll use Google Colab to test our Gemma 7B model by connecting to the serverless endpoint. Colab offers a free, cloud-based Jupyter notebook environment, making it easy to send requests and manage deployments without setting up local resources.
vLLM is compatible with OpenAI’s API, so we'll interact with it similarly to OpenAI’s models. You can also use other development environments like Visual Studio Code (VSCode) or any IDE that can make HTTP requests.
- Go to Colab and create a new notebook.
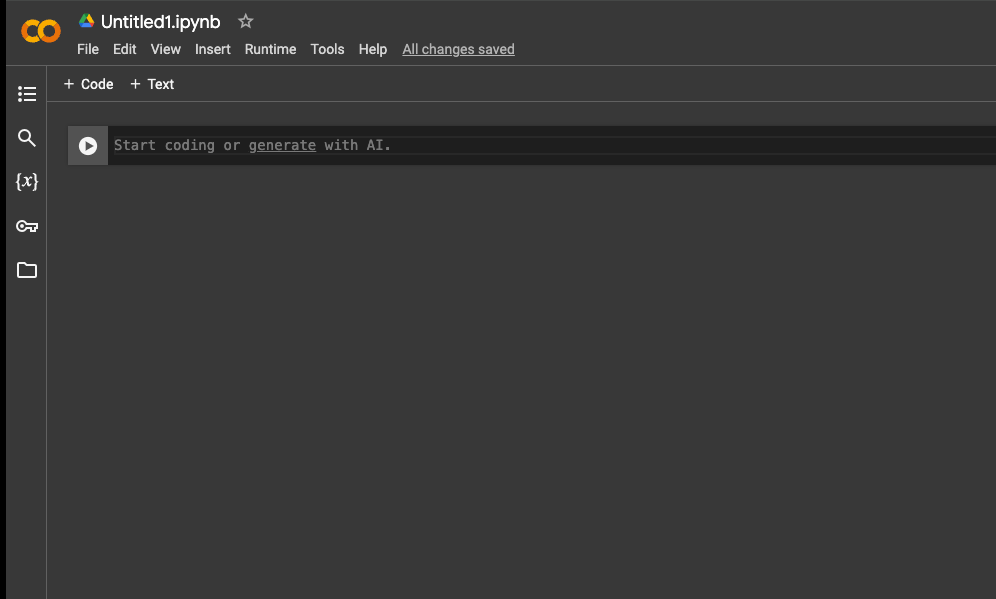
- Grab your API key from your RunPod console by navigating to Settings > API Keys. Generate and copy the key, then paste it into the code.
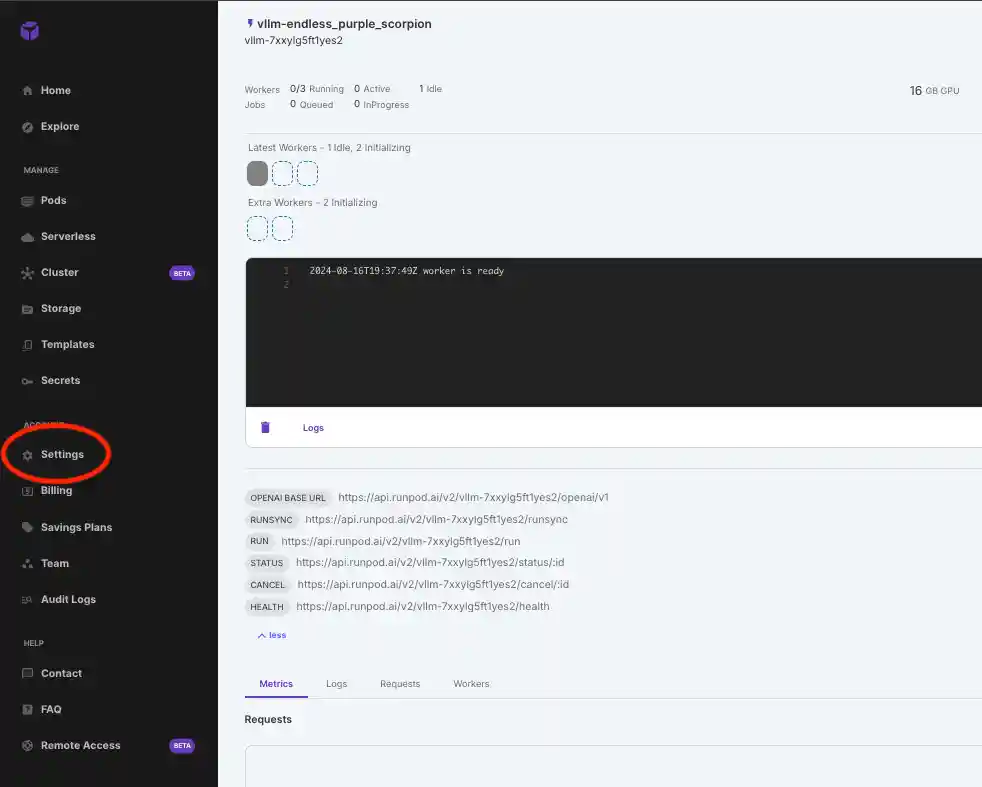
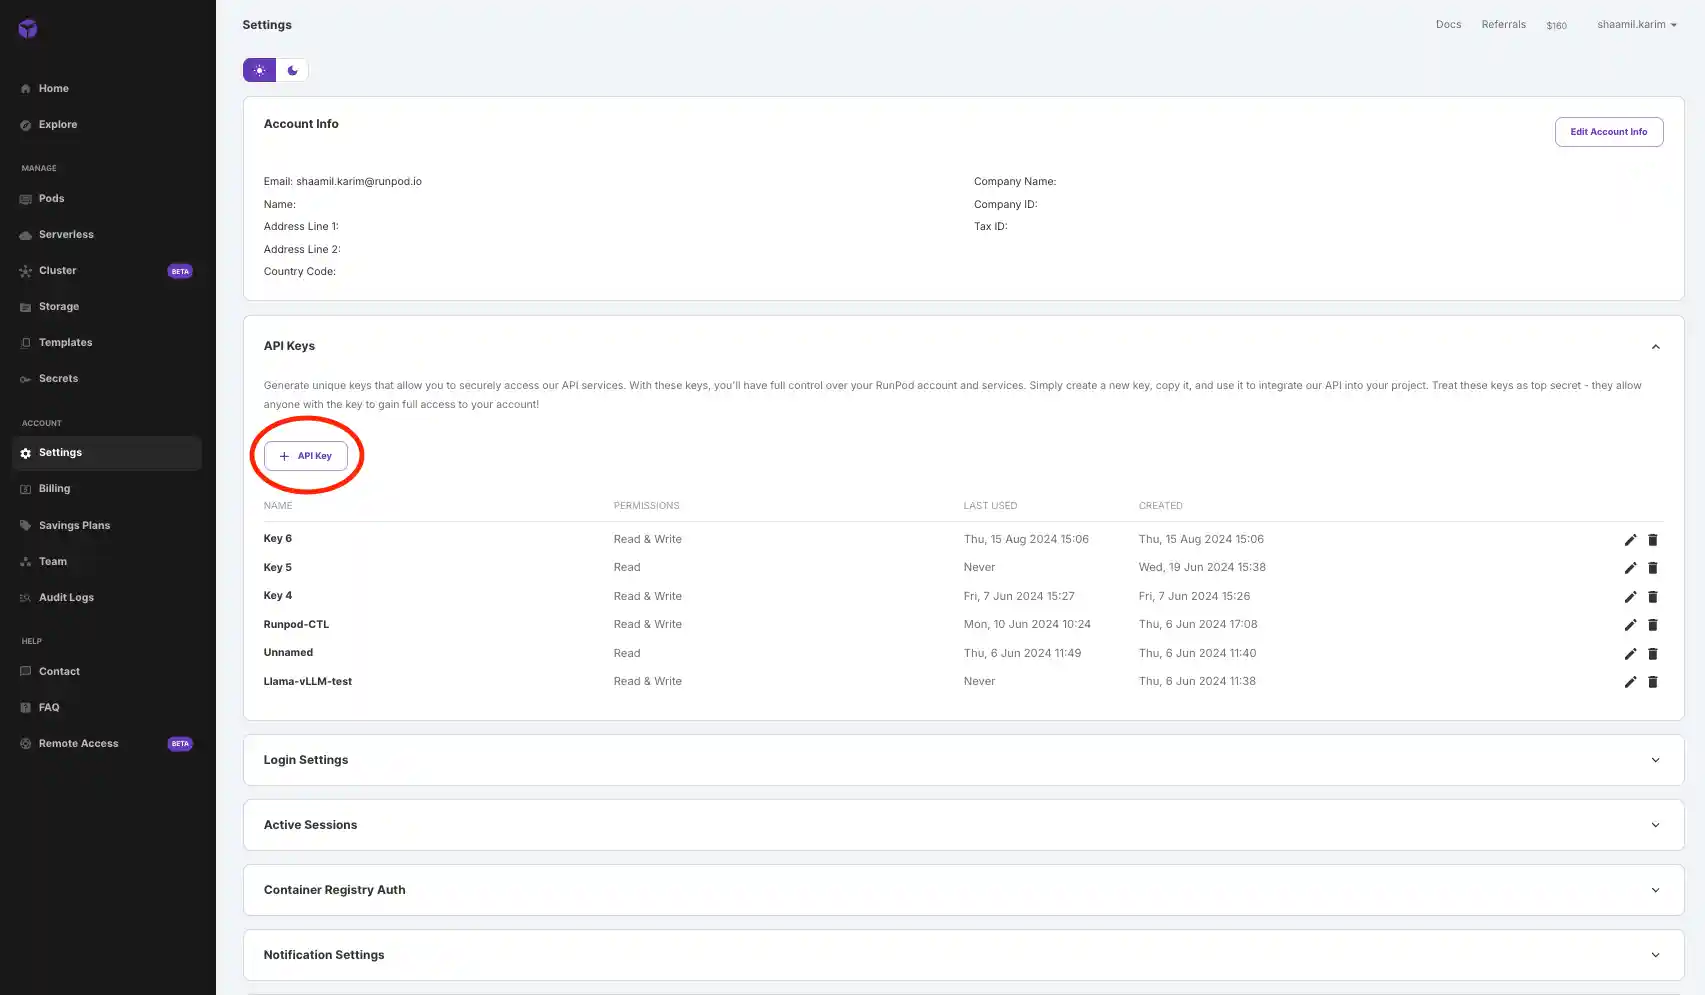
- Get your base URL from the logs below your serverless endpoint page and paste it into the code.
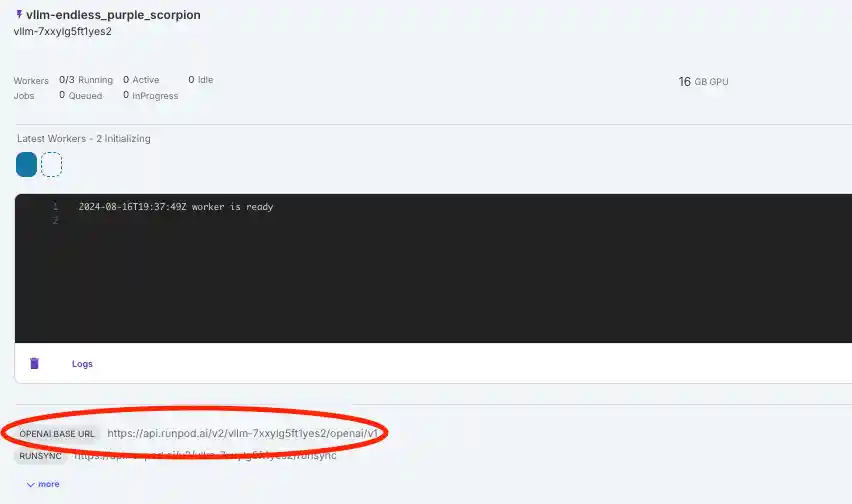
Paste the following code into the notebook and insert your API key and base URL:
import os
from openai import OpenAI

api_key = "YOUR API KEY HERE"

client = OpenAI(
    api_key="YOUR API KEY HERE",
    base_url="YOUR BASE URL HERE",
)

messages = [{"role": "assistant", "content": "Hello, I'm your assistant. How can I help you today?"}]

while True:
    for message in messages:
        print(f"{message['role'].capitalize()}: {message['content']}")

    prompt = input("User: ")
    messages.append({"role": "user", "content": prompt})

    response = client.chat.completions.create(
        model="google/gemma-7b",
        messages=messages,
        temperature=0.7,
        top_p=0.8,
        max_tokens=100,
    ).choices[0].message.content

    messages.append({"role": "assistant", "content": response})
Install the necessary OpenAI libraries to interact with your model using the following pip command:
pip install openai
Now, you can run the notebook and interact with the model. The first response might take a few minutes while the model is loaded, but subsequent requests will be faster.
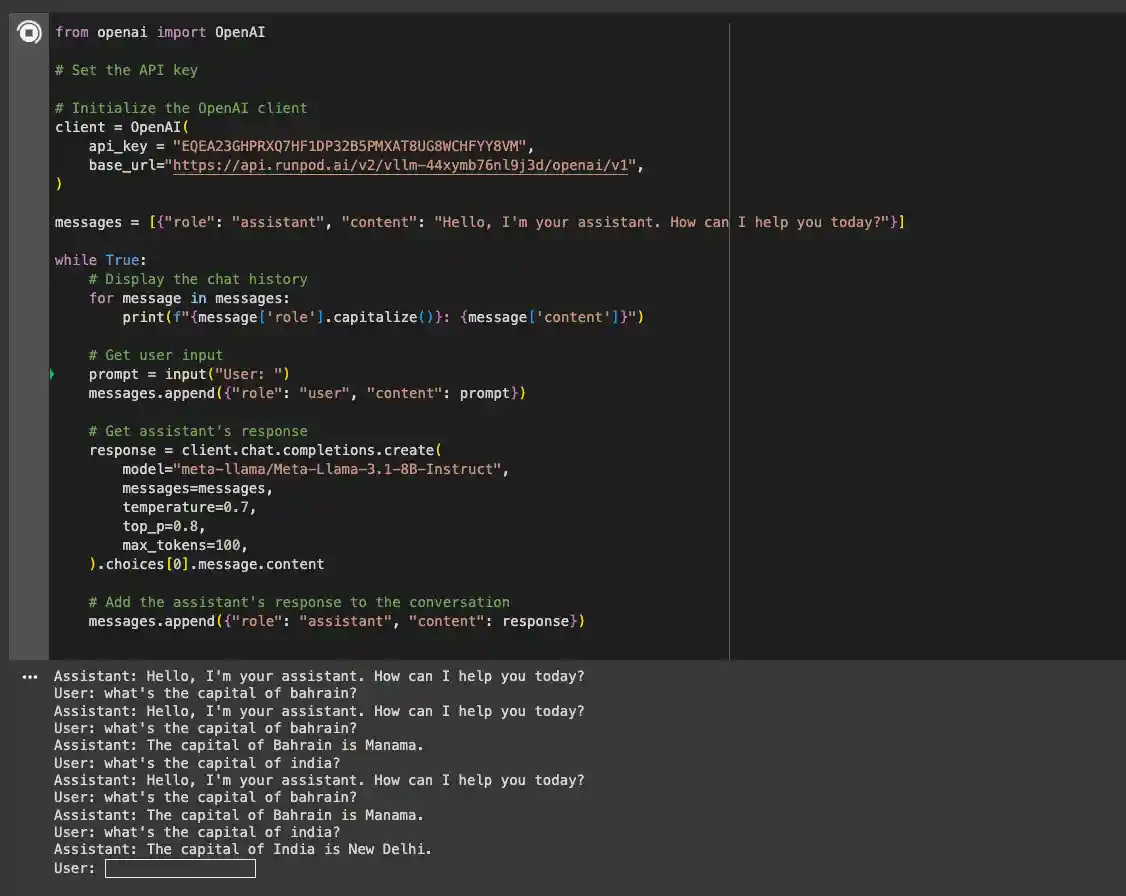
Troubleshooting
- If you see a 500 error, try increasing the VRAM size of your GPU.
- For gated models (e.g., Gemma), ensure you have access and enter the appropriate access token when creating your endpoint.
- If the status remains "in queue" for over 10 minutes, verify that the model is properly downloaded and loaded.
Conclusion
In this blog, we’ve explored the capabilities of Google’s Gemma 7B model and how to deploy it using vLLM on RunPod’s serverless infrastructure. The combination of the powerful Gemma 7B model and vLLM’s efficient performance makes this setup ideal for a wide range of applications, offering both speed and cost-effectiveness.
Get started with your Gemma 7B deployment on RunPod today using the quick deploy option!
