How to use RunPod's Fast Stable Diffusion template
If you're interested in using the Fast Stable template, this blog post will guide you through the process.
If you're looking for a more detailed post, here's an updated one that goes step by step through all the cells.
First off, it's important to note that the Fast Stable template is not compatible with encrypted volumes, so keep that in mind before getting started.
The Fast Stable template is a RunPod packaged template for stable diffusion, but it's important to note that Runpod team doesn't maintain the code for this template. We simply package it to make it easier for you to use. If you need help with settings or have questions, feel free to ask on RunPod discord, but keep in mind that we are not experts in stable diffusion. Though we do our best to help, but the RP community or automatic/stable diffusion communities may be better resources for you.
When using the Fast Stable template, it's important to wait until the GPU/CPU Utilization % is at 0 before attempting to connect. If you try to connect before the pod is ready, you'll likely receive a 502 error.
To start Fast Stable Diffusion template head over to the Templates page and select the template, or just click on this link.
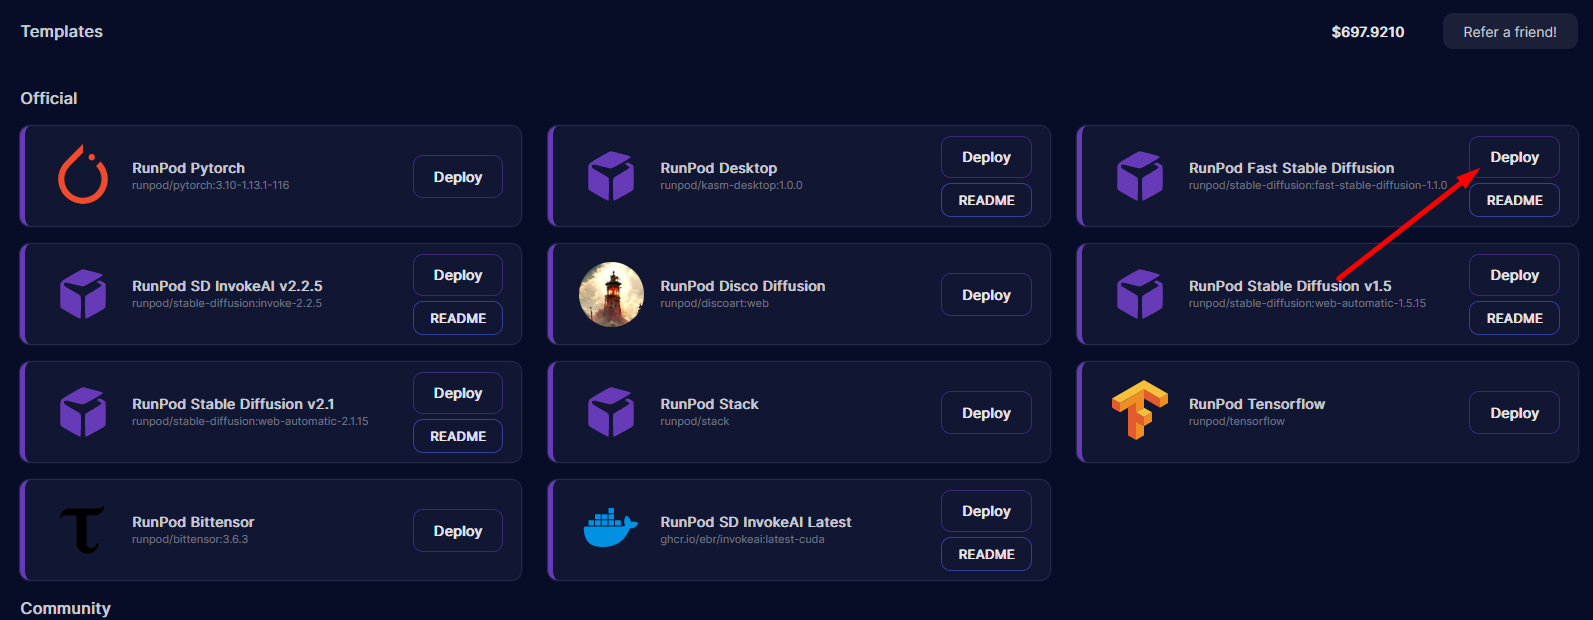
Before creating pod you have option to give additional storage for your pod.
This template supports running AUTOMATIC1111 web UI but also has custom templates for training your own models using Dreambooth.

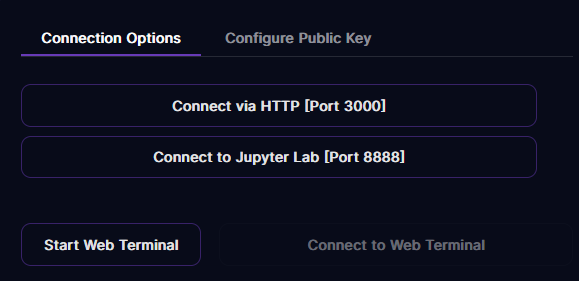
To get started with the Fast Stable template, connect to Jupyter Lab. From there, you can run the automatic1111 notebook, which will launch the UI for automatic, or you can directly train dreambooth using one of the dreambooth notebooks.
To access Jupyter Lab notebook make sure pod is fully started then Press Connect
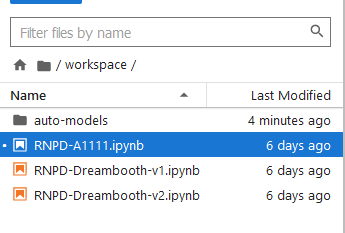
To start A1111 UI open RNPD-A1111.ipynb file by double-clicking it
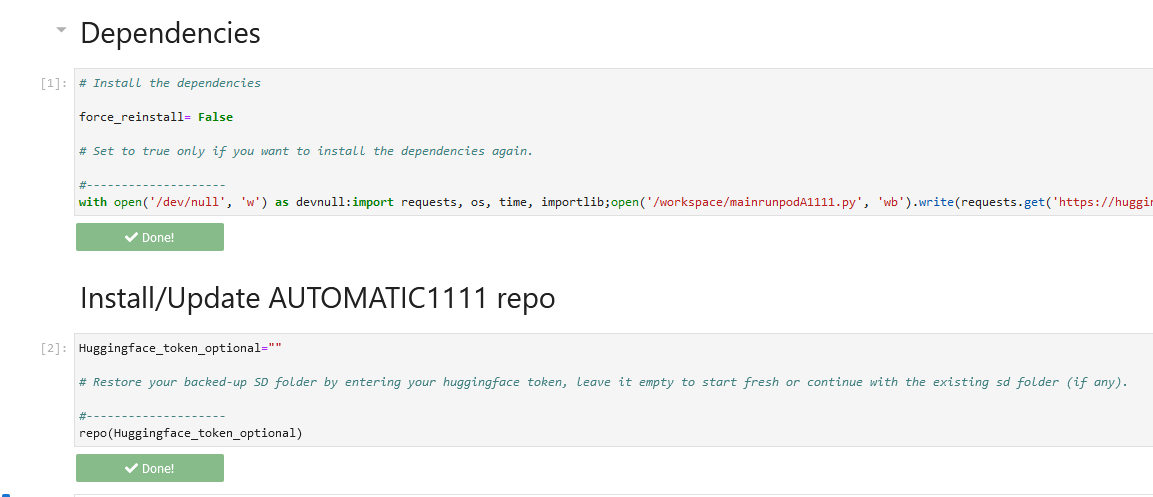
After you have open notebook you need to run first 2 cells the first one will install required packages and second one allows you to use own HuggingFace token for model downloads.
Now we are moving to selecting SD m0del we want to use
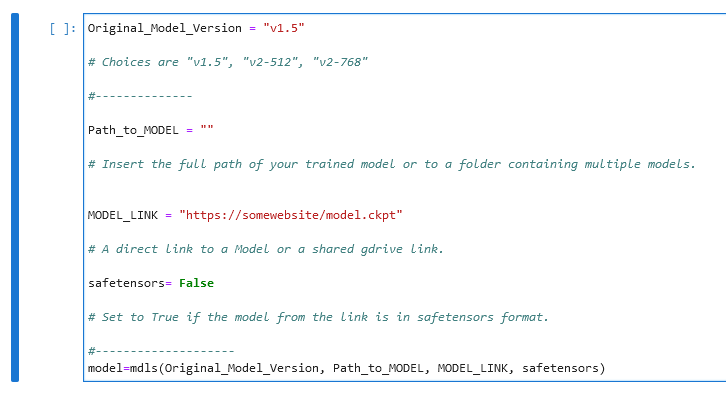
First option allows you to pick base SD model that will be downloaded from HuggingFace all you need is to replace v1.5 with model you want.
You can also give direct link or google drive link to ckpt or safetensor file by replacing MODEL_LINK section (it will download that model instead of base)
If you plan to use ControlNet with 1111 UI you can easy download required models using next cell.
NOTE: ControlNet models are very large, so selecting them all will incur a pretty long download (50+GB!!). UPDATE: We pruned them down a bit so it's much more manageable now :)

Starting 1111 UI
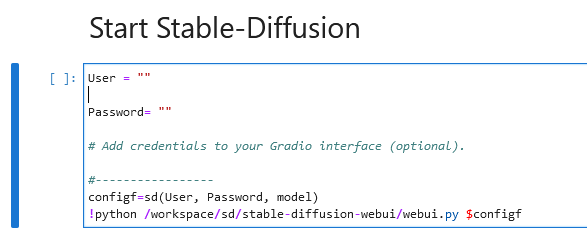
Now we finally can start web UI by running this next cell. Make sure that you run the other cells first! This cell does depend on the dependency cell, the A1111 cell, and the model cell. You can skip ControlNet if you aren't planning to use it!
After 1111 UI starts you will see link to your web UI. You can also access it from connect button on RunPod website.

Customization
If you want to change the launch parameters, you can do so in the "Start Stable-Diffusion" cell in the RNPD-A1111.ipynb notebook. You can change the launch params by changing this line: !python /workspace/sd/stable-diffusion-webui/webui.py $configf.
Hopefully, this blog post has given you a better understanding of how to use the Fast Stable template. If you have any questions or need help, don't hesitate to send message on RunPod's Discord or other communities for support.