How to Run a GPU-Accelerated Virtual Desktop Environment on RunPod

There are a few use cases for running a GPU accelerated virtual desktop on RunPod. One common use case is for those who need to use demanding applications that require a lot of processing power, such as 3D rendering with Blender. In this blog post, we'll go over how to easily deploy a pod with everything you need to get rendering.
In this post, we'll show you how to run Ubuntu Remote desktop with access to GPU running on RunPod.
First, make sure you have some funds in your account. If you need more credits, you can visit the Billing section of your dashboard to purchase more. Then, you can use this link to deploy the latest desktop template. Pick the GPU you want to use and start your pod using on-demand.
Default username: kasm_user
Default password: password
While you can use the template with the default password, you may want to update it for security. To do this, click Edit Pod.
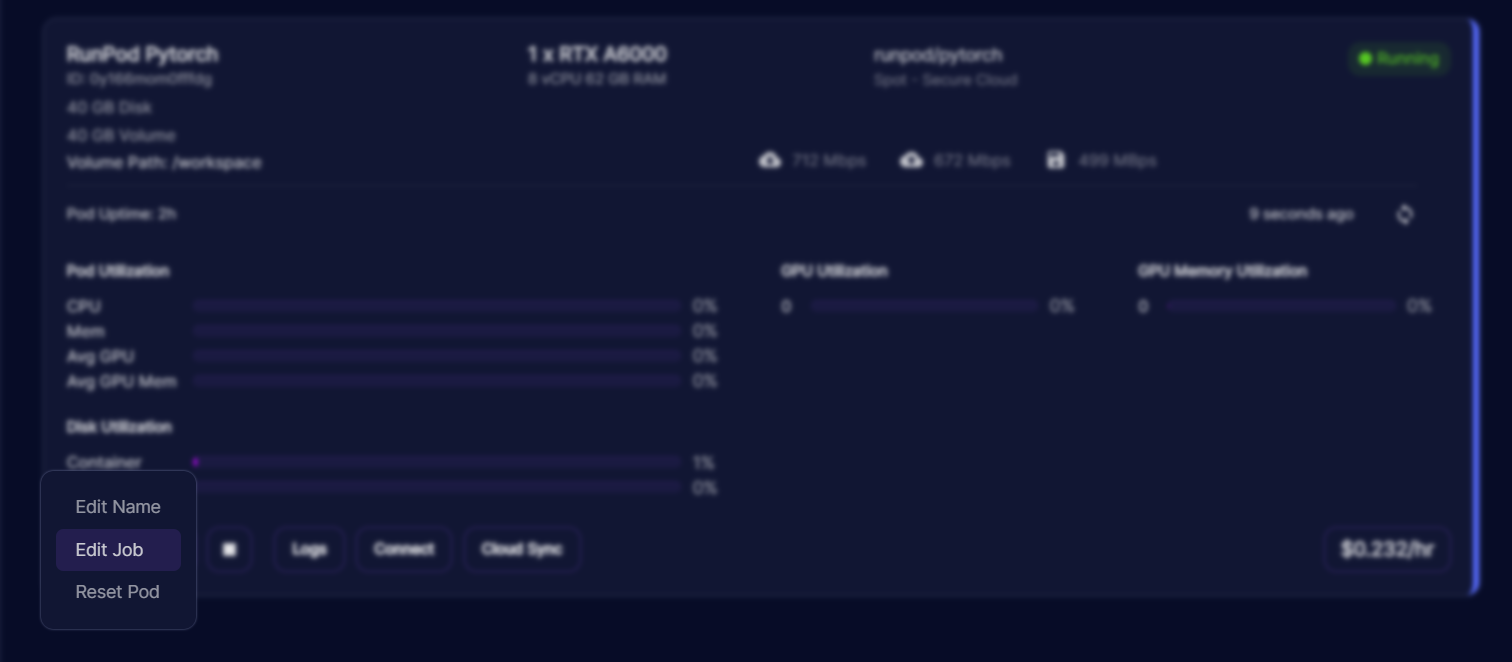
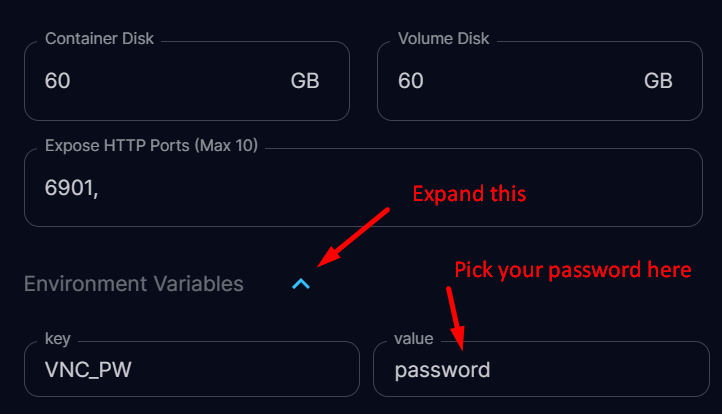
Then head over to the Environment Variables section and replace password with the password of your choice.
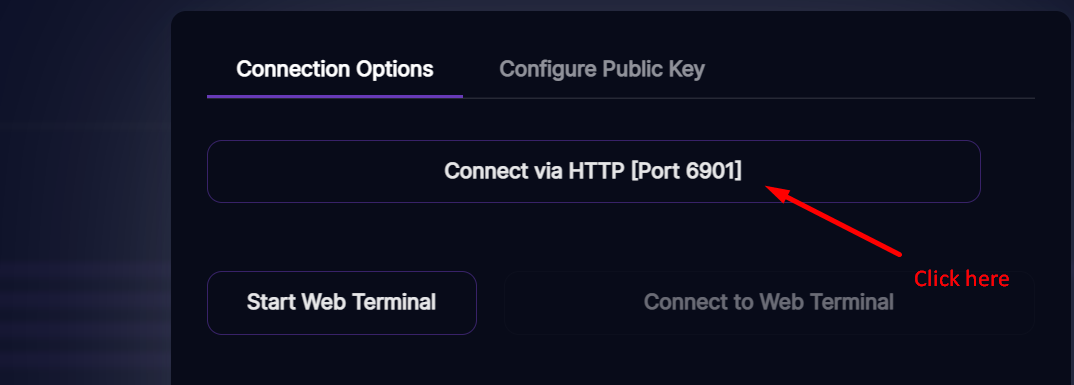
After that, click Apply and the pod should load. Accessing the pod before it is fully started will throw a 404 or 502 error. A good indication that the pod is ready is the CPU utilization falling to 0%. Once the pod is fully loaded, the Connect button will become active. Then, you will be able to connect to your remote desktop using the "Connect via HTTP" button using the username and password that you defined above.
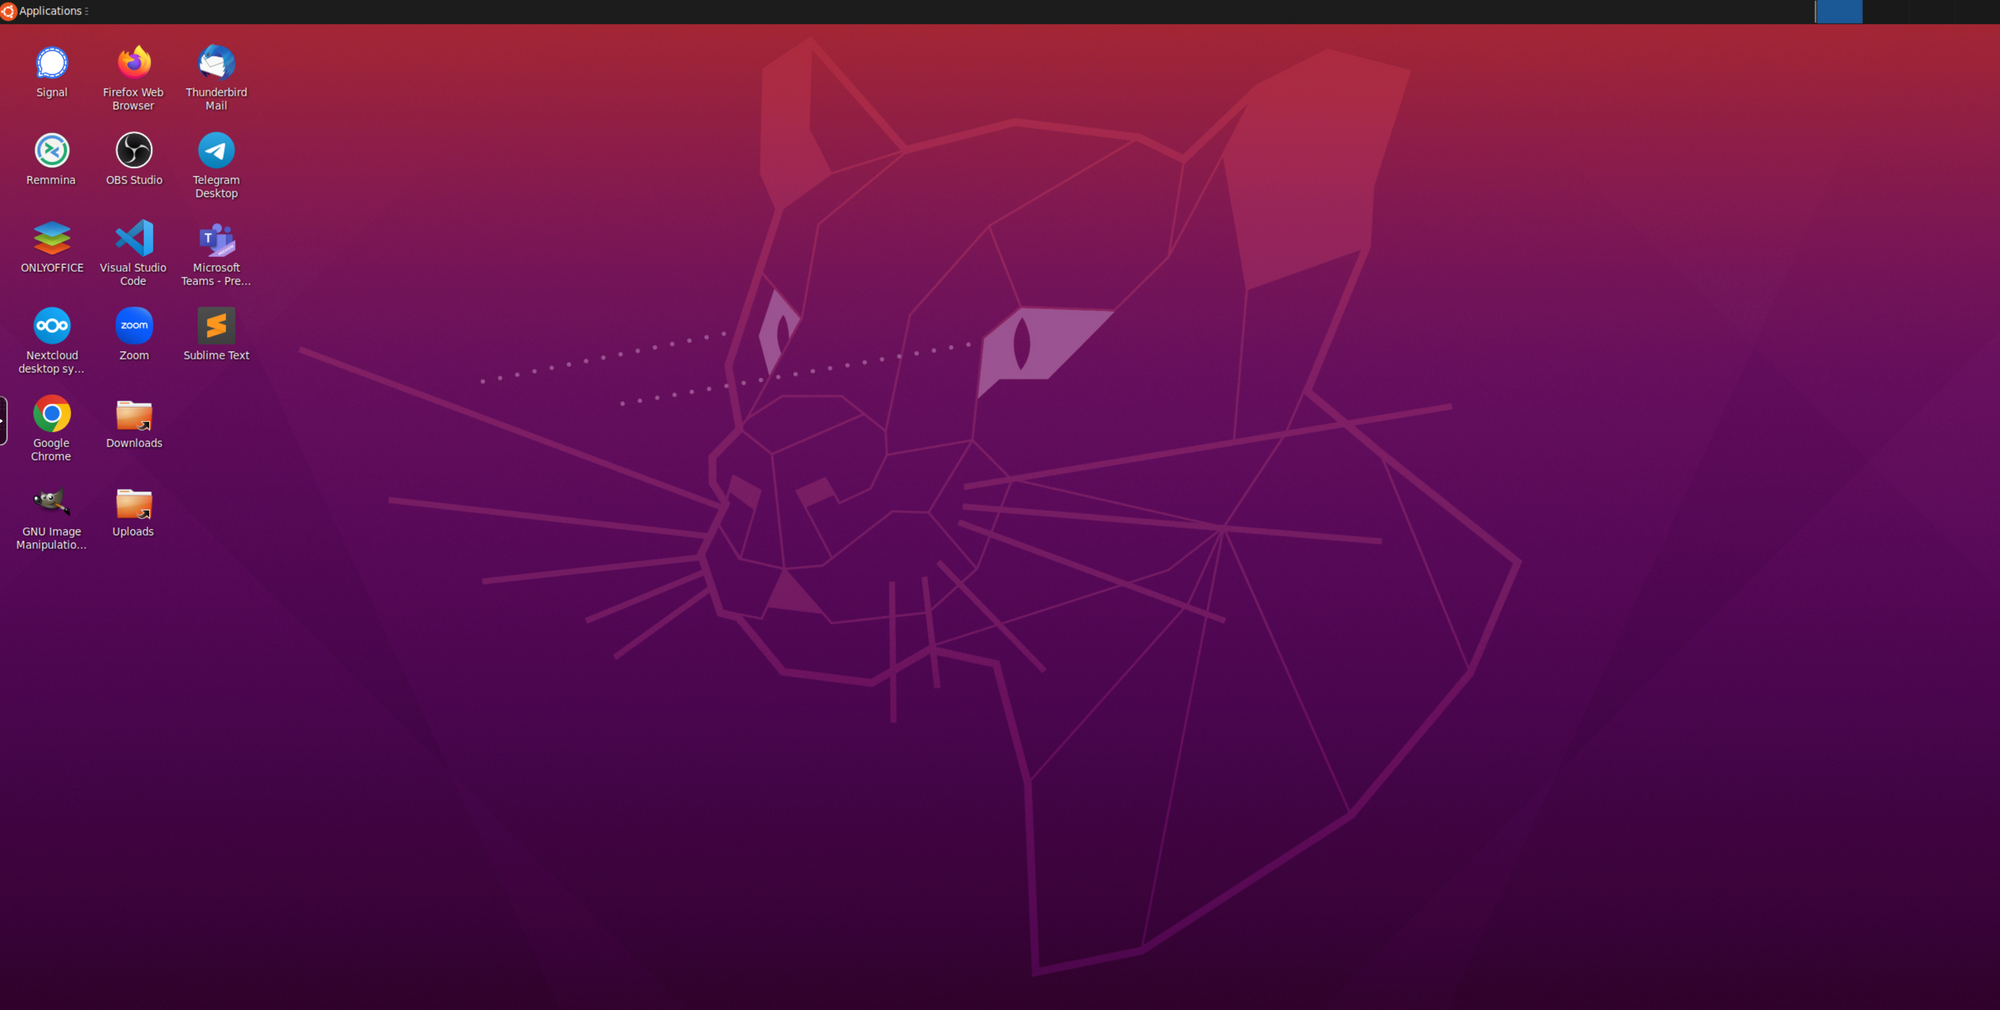
Once you have logged in, you should see your desktop screen.
Important notes:
This template is set to save /home as workspace so any preinstalled apps will be gone on pod reset, but will be retained on pod restart.
At the middle of the left side there is a button to open a side bar where you can find additional access to tools like clipboard or settings to control streaming quality.